We recently routed our first (raw/uncolorized) AR Mode image from our Camera Board through our FPGA:
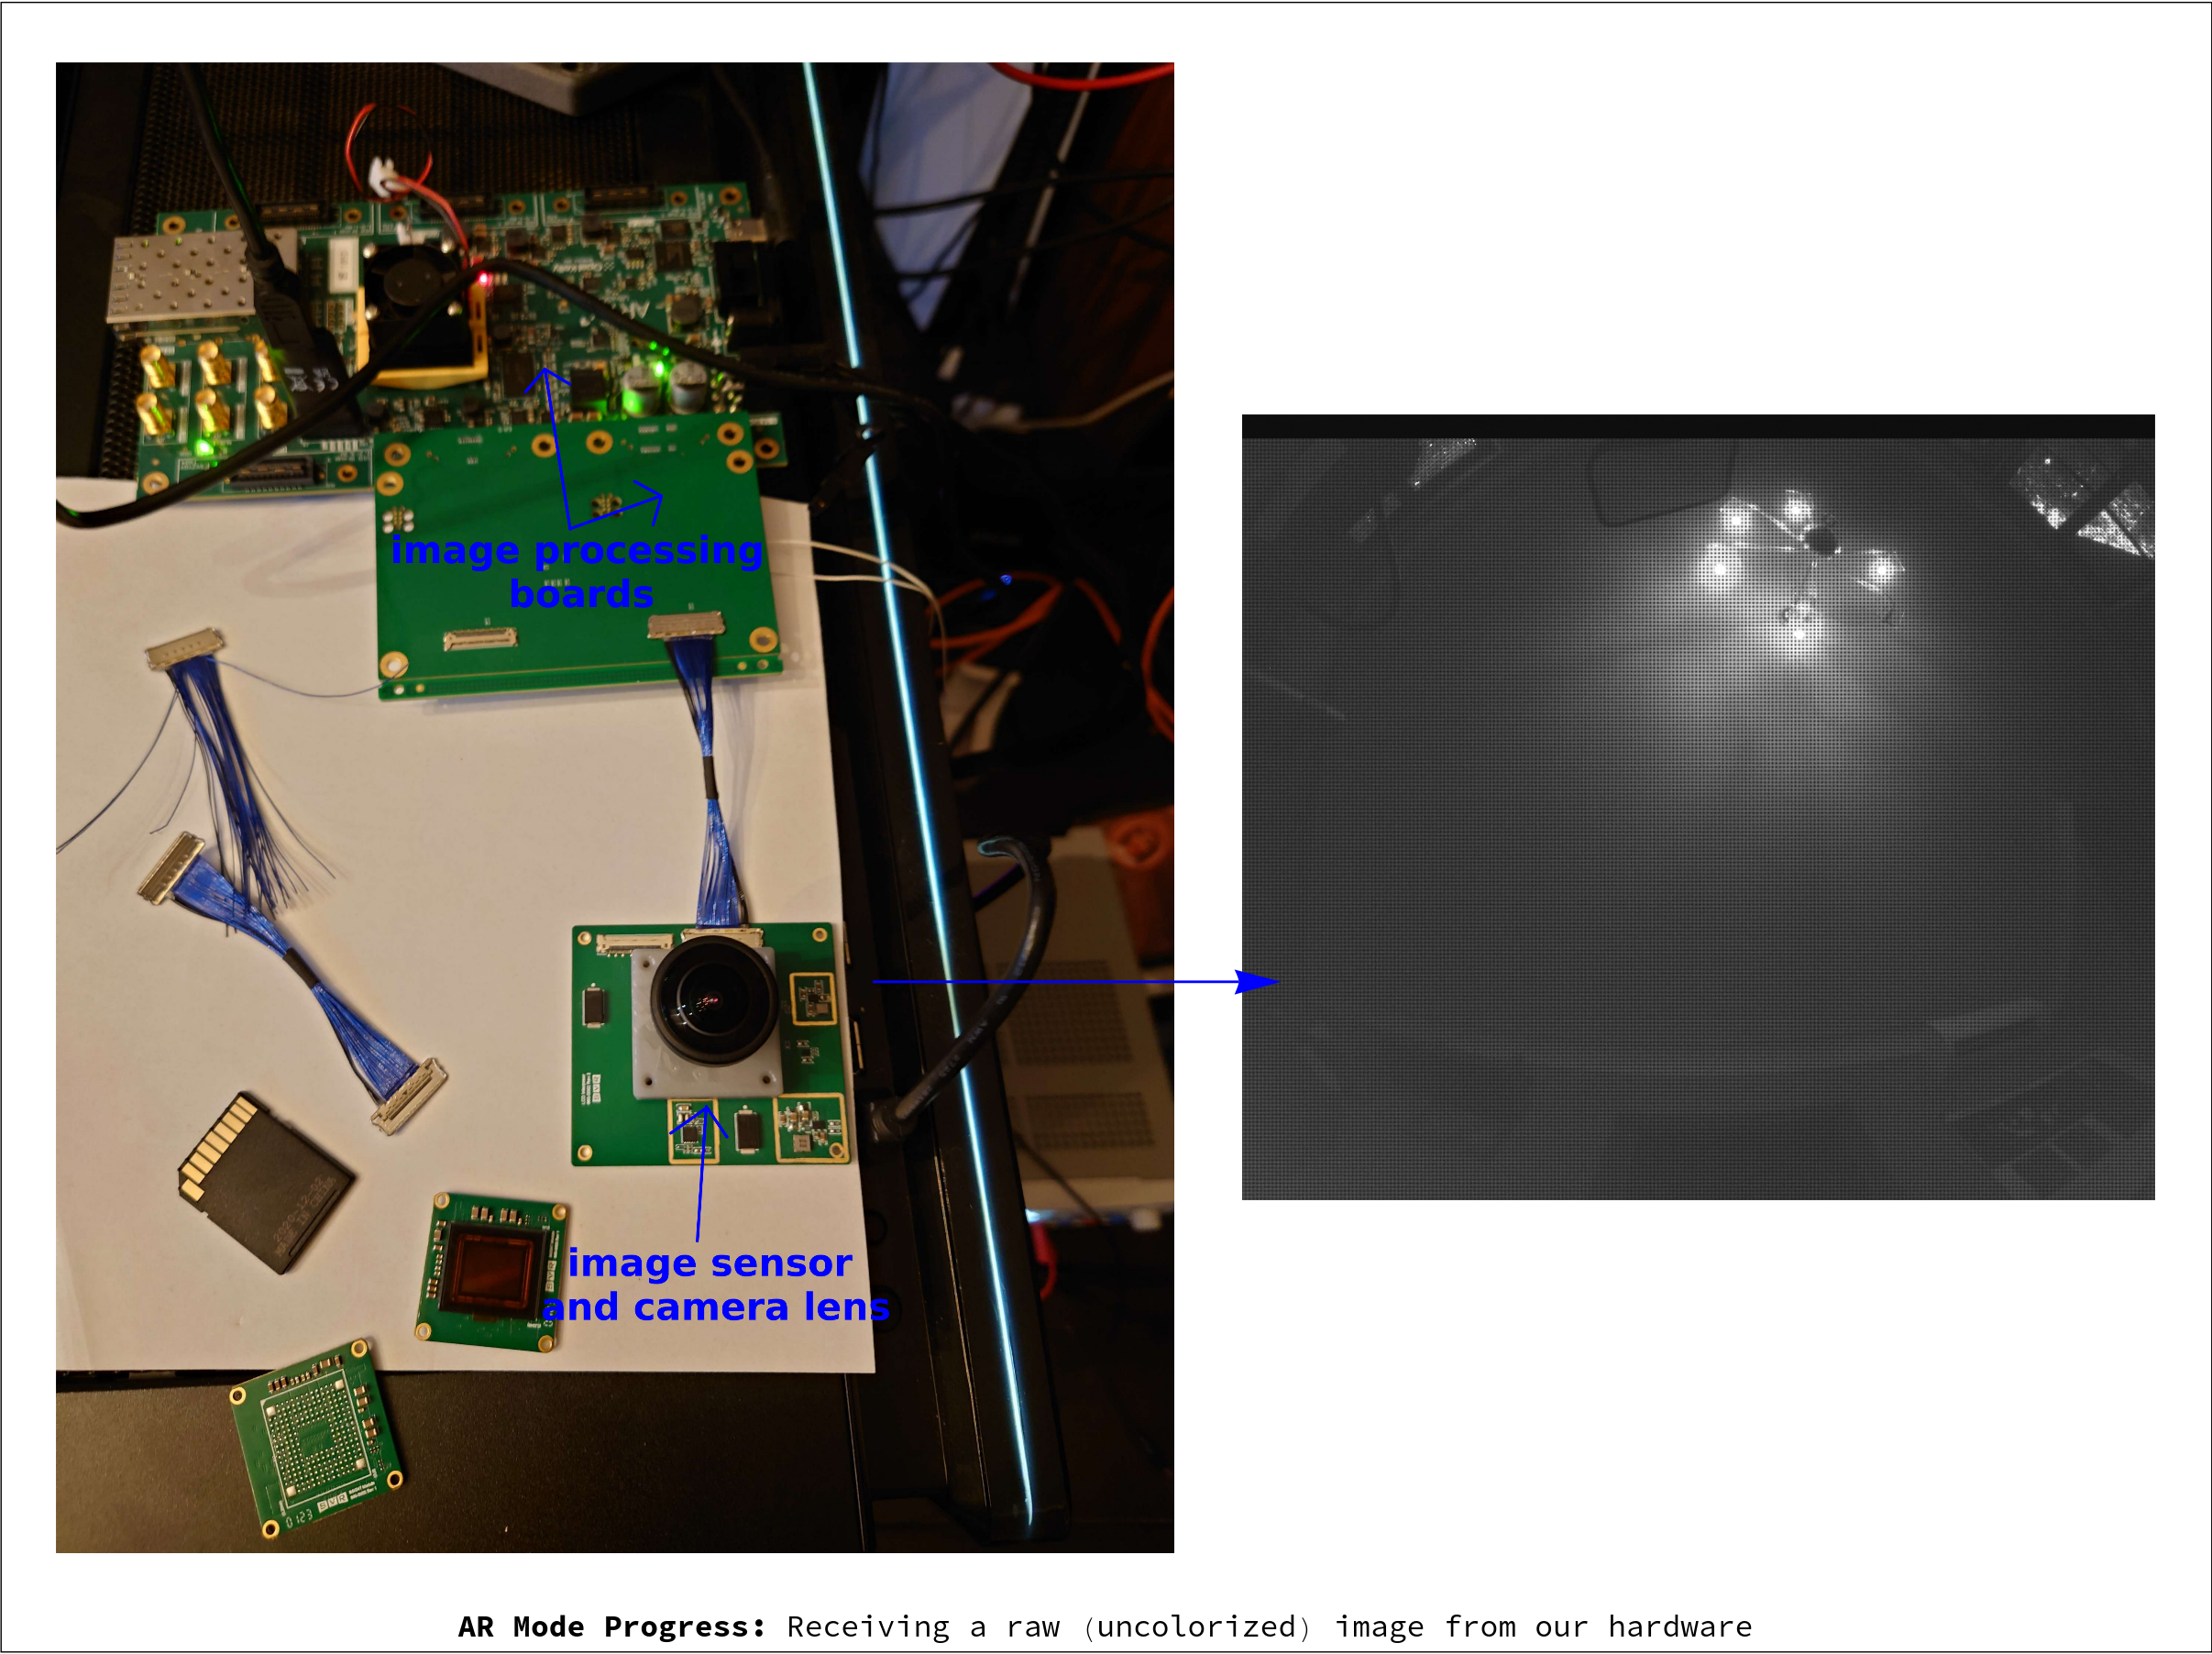
This image might not look like much, but it represents a major hardware milestone for the Simula One's AR system (involving several of our boards working together). It particular, it integrates our Camera Boards (which contain image sensors and camera lenses) with an FPGA and our FPGA Adapter Board (for image processing). Note that the presented image above is still raw/monochrome and hasn't undergone actual FPGA image processing, where it will be colorized and enhanced.
1 Transferring image data from our Camera Boards to our FPGA (FINISHED)
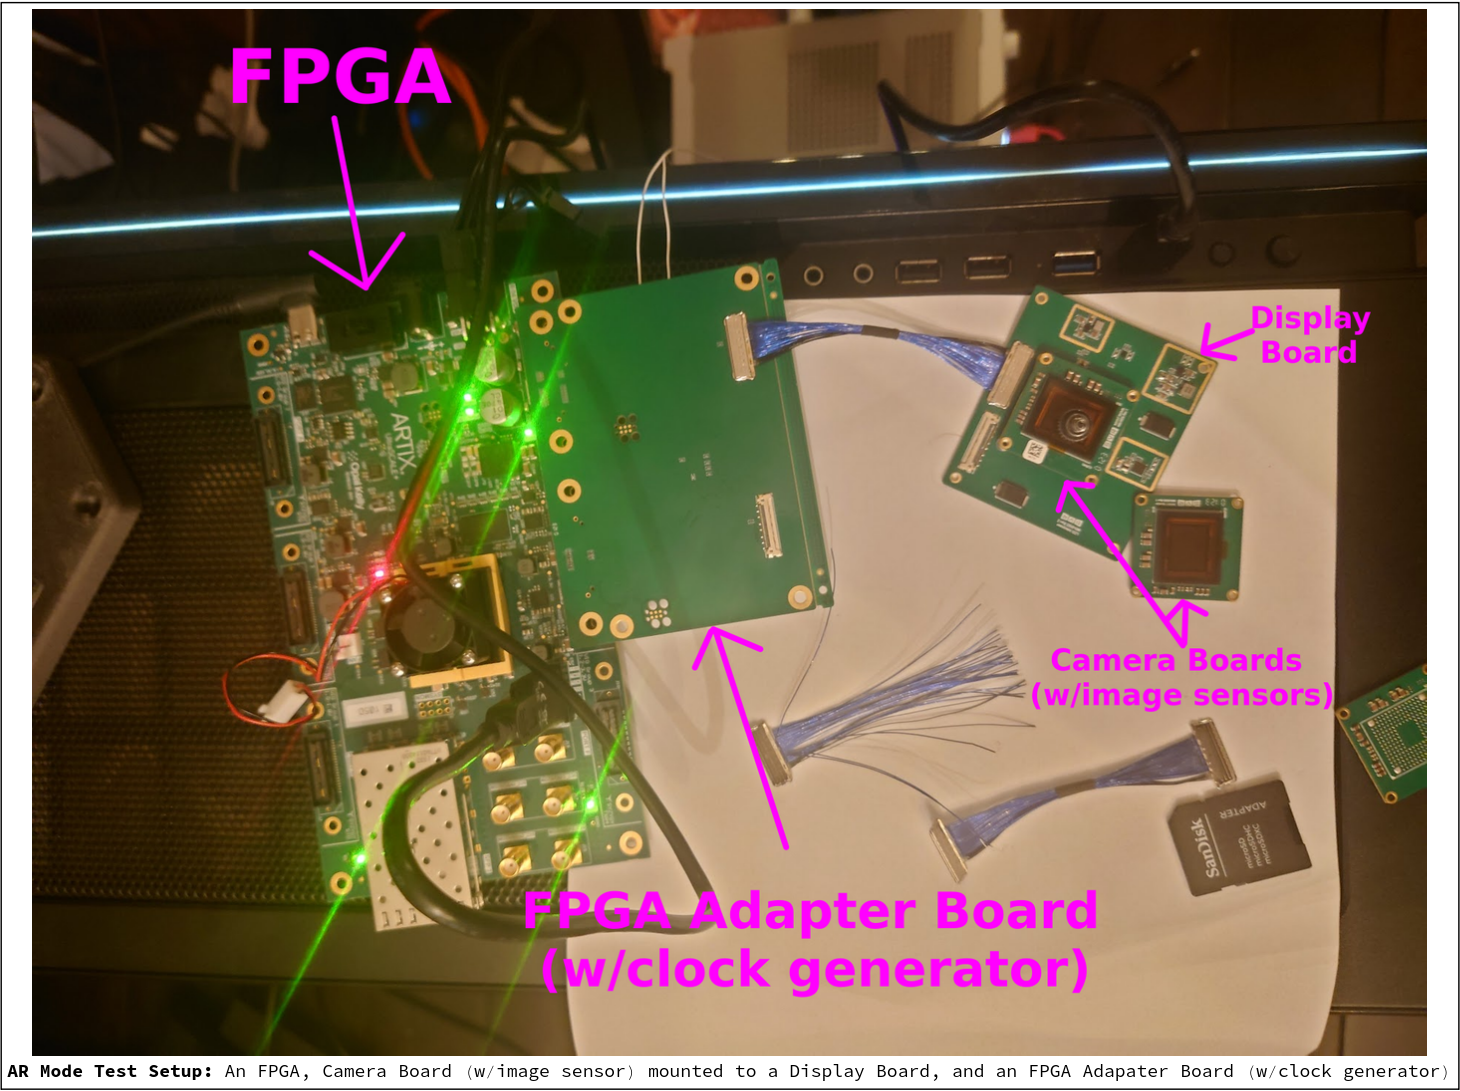
Our test setup contains the following components:
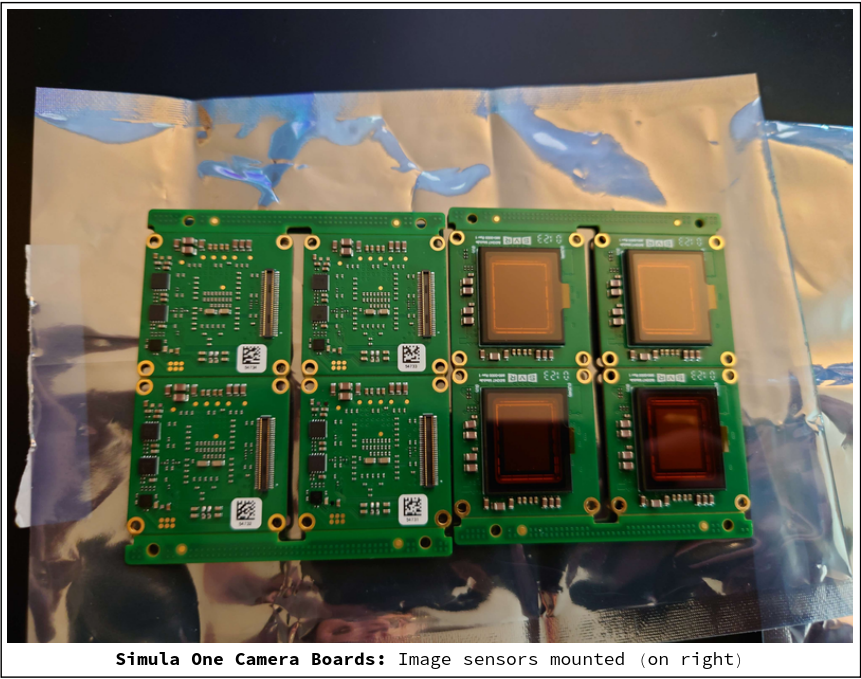
As discussed in a a prior post on the Simula One's image processing pipeline, we use Sony IMX547 image sensors (mounted to our Camera Boards) to send raw image data to our FPGA via SLVS-EC. (Note that boxes in blue denote non-FPGA boards, boxes in white denote interfaces, and boxes in yellow mark FPGA abstractions):
![]()
Meanwhile, camera control from the FPGA to our Camera Boards happens via SIP:
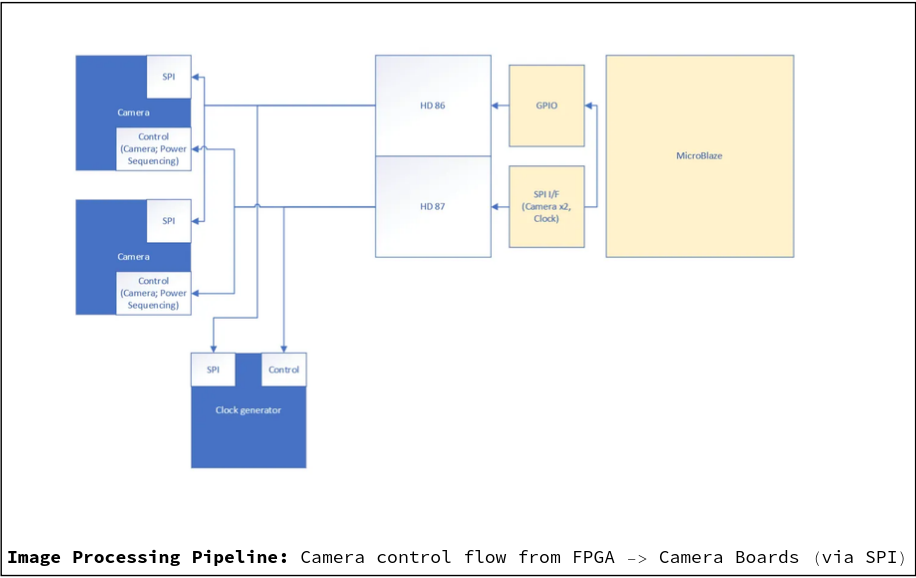
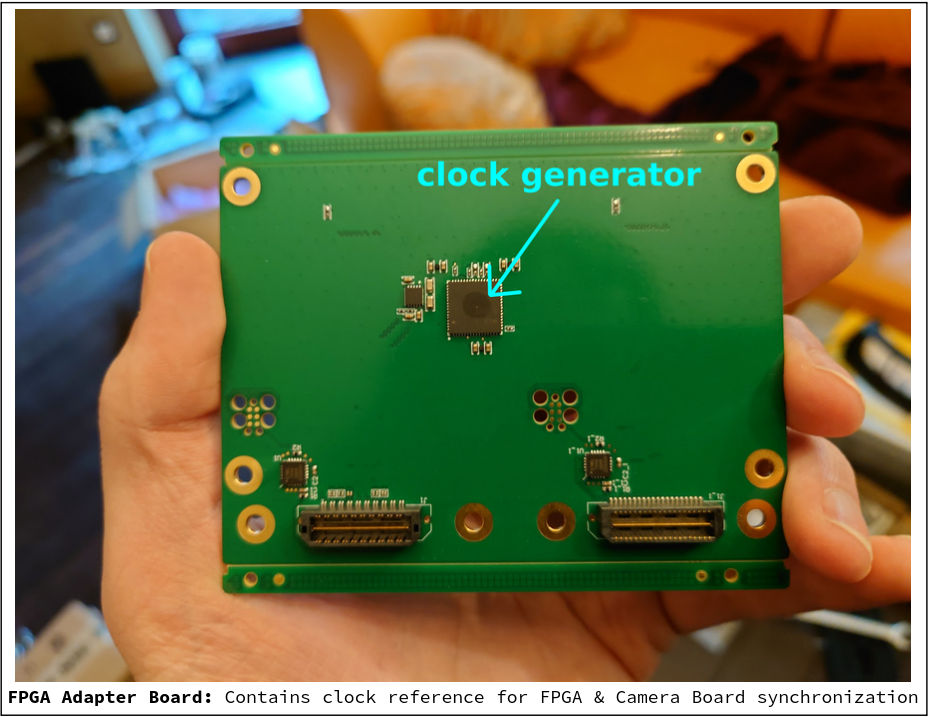
Our FPGA Adapter Board (shown in blue on the above block diagrams) has a clock generator which synchronizes these two systems:
All of the hardware/software integration for this part of our system is finished, and our FPGA code can be found at SimulaVR/simula-one-fpga-vitis/imx_init on GitHub.
All of the hardware and gate-/firmware for this part of our system is finished, and the IMX547 initialization firmware code can be found at SimulaVR/simula-one-fpga-vitis/imx_init on GitHub. We cannot publish the FPGA HDL code at the moment, but will do so at a later date.
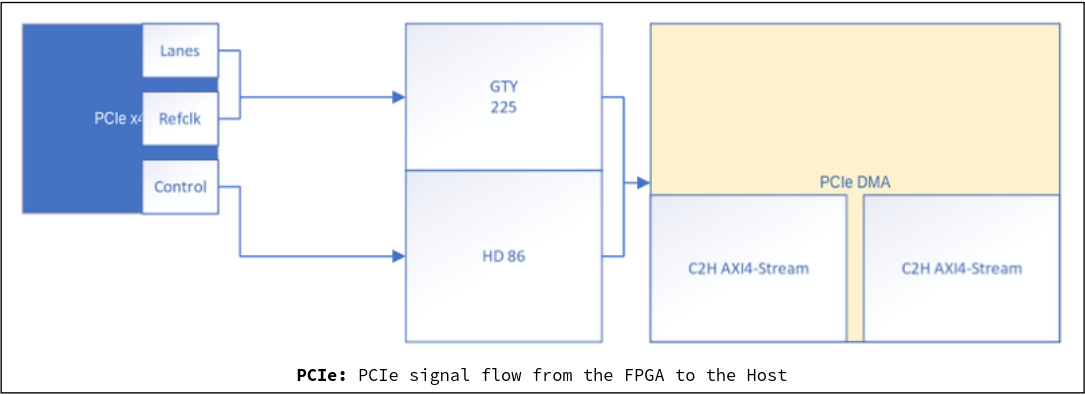
2 Transfering (fully processed) image data from the FPGA to our Host (IN PROGRESS)
The Simula One uses a PCIe connection between our FPGA and Host:
On the FPGA itself, we're implementing the following image processing steps to colorize and enhance the AR images:
- Black Level & Flat Field Correction: Adjusts the image for uniform black and white levels due to lens abnormalities, and subtracts any black level offsets.
- Bad Pixel Correction: Patches up defective pixels on the image sensors.
- Debayering: Colorizes the raw image.
- Auto Exposure: Adjusts the exposure time and aperture length of the sensors and camera lenses.
- Auto White Balance: Ensures neutral tones are shown correctly.
- Color Correction: Improves the color representation accuracy.
- Gamma Correction: Adjusts pixel values of images to better match the way that the human eye perceives light.
These steps are described here in more detail. Our image processing code is a work in progress, but has been thrown up at SimulaVR/simula-one-fpga-vitis/isp-hls on GitHub.
3 Raw Image Demonstration
Putting this all together (except for the image processing steps above), we can finally route raw pictures from our image sensors to our host. Interestingly, the first picture we captured actually came from a lensless image sensor:
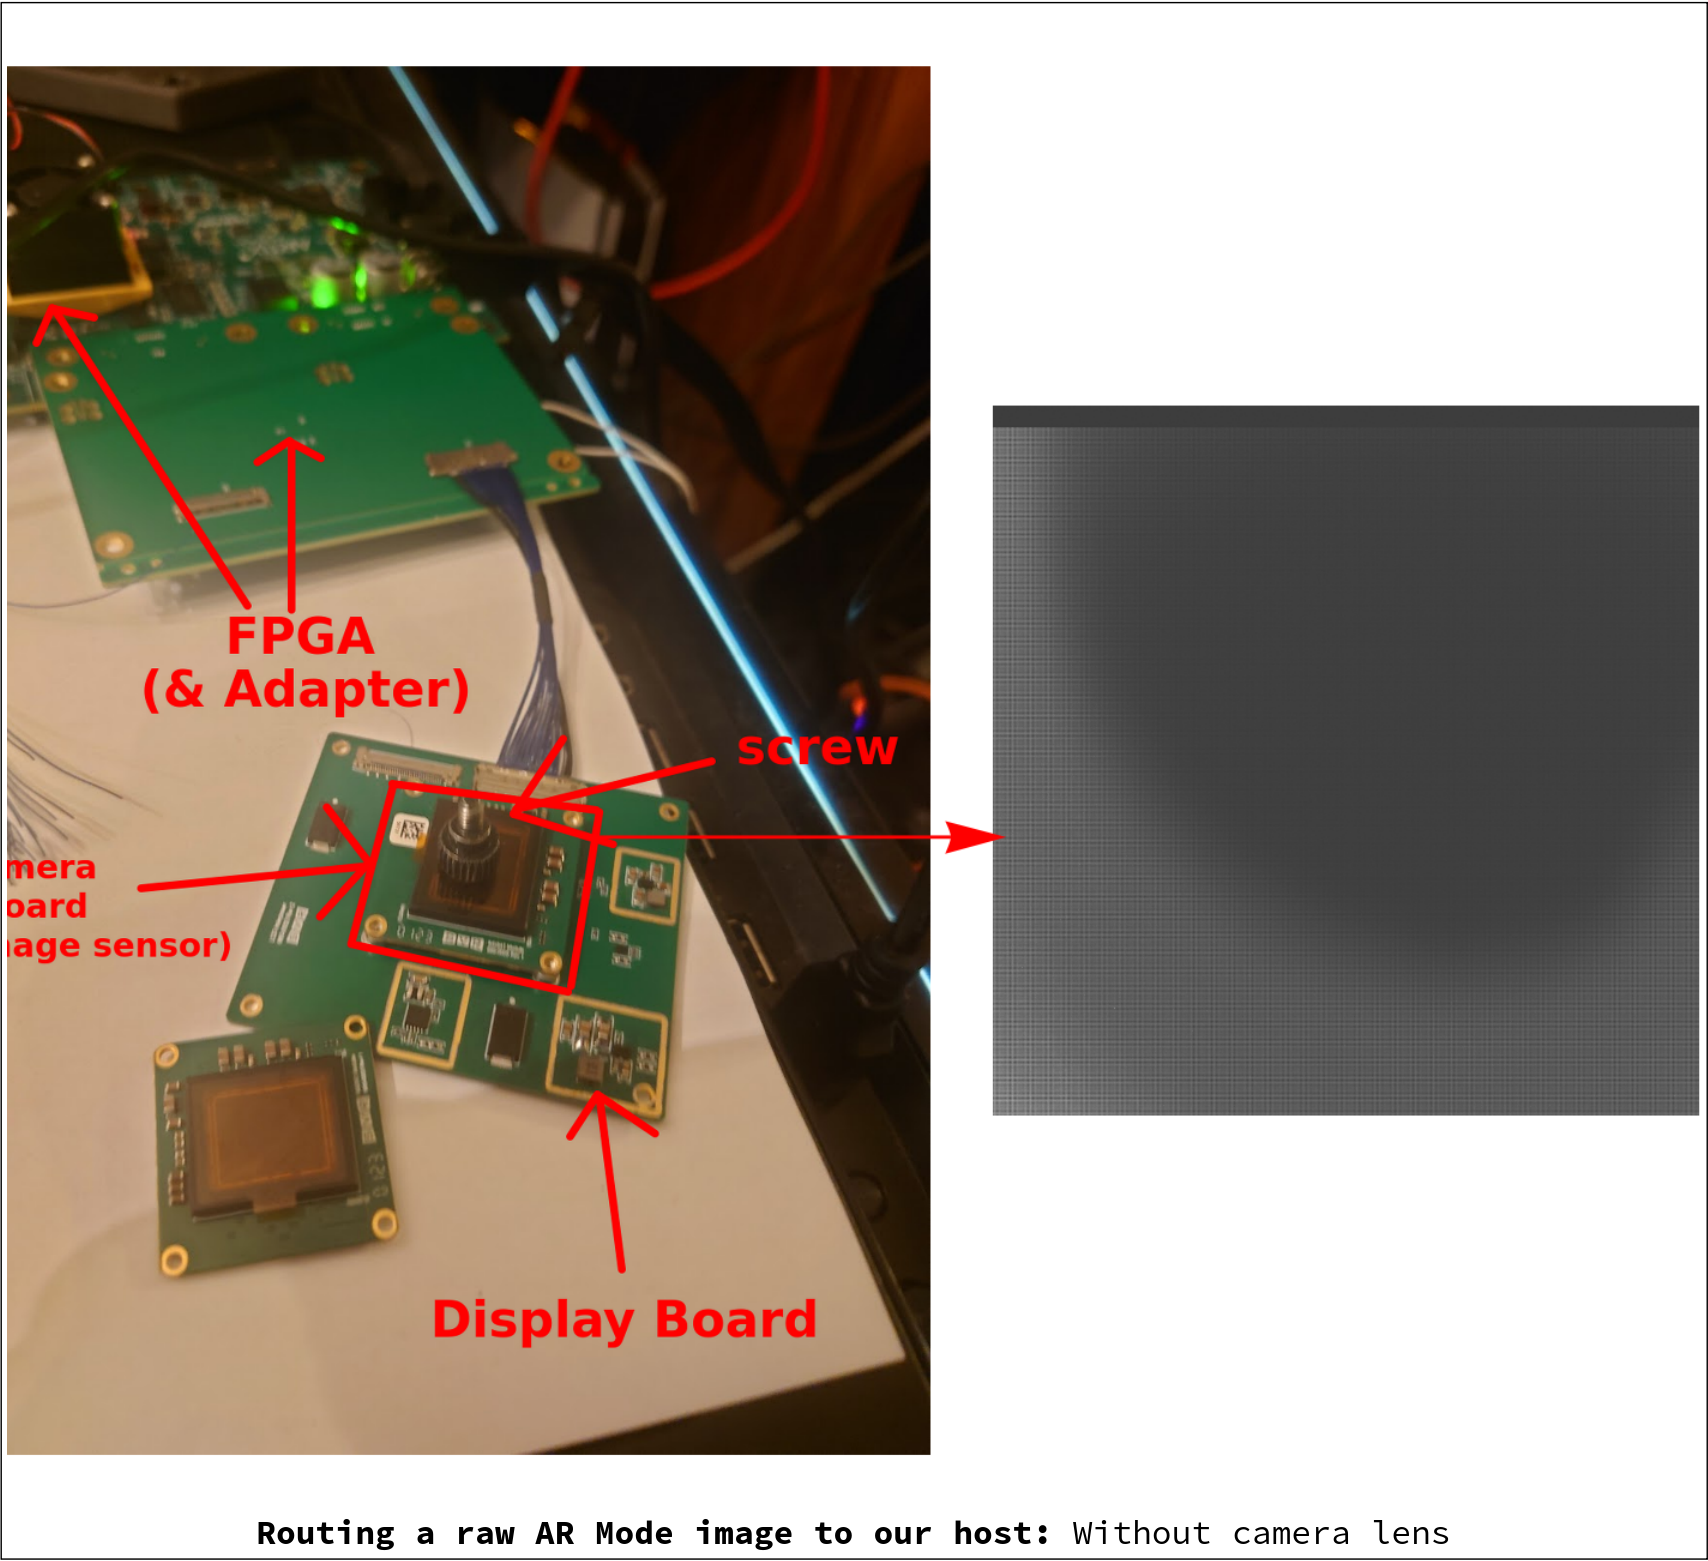
As a crude test mechanism, we placed a screw (yes, a screw :) over the image sensor, just to see if we could generate some sort of recognizable image. The resulting picture shows the base of the screw occluding the sensor and forming a dark circle (as expected).
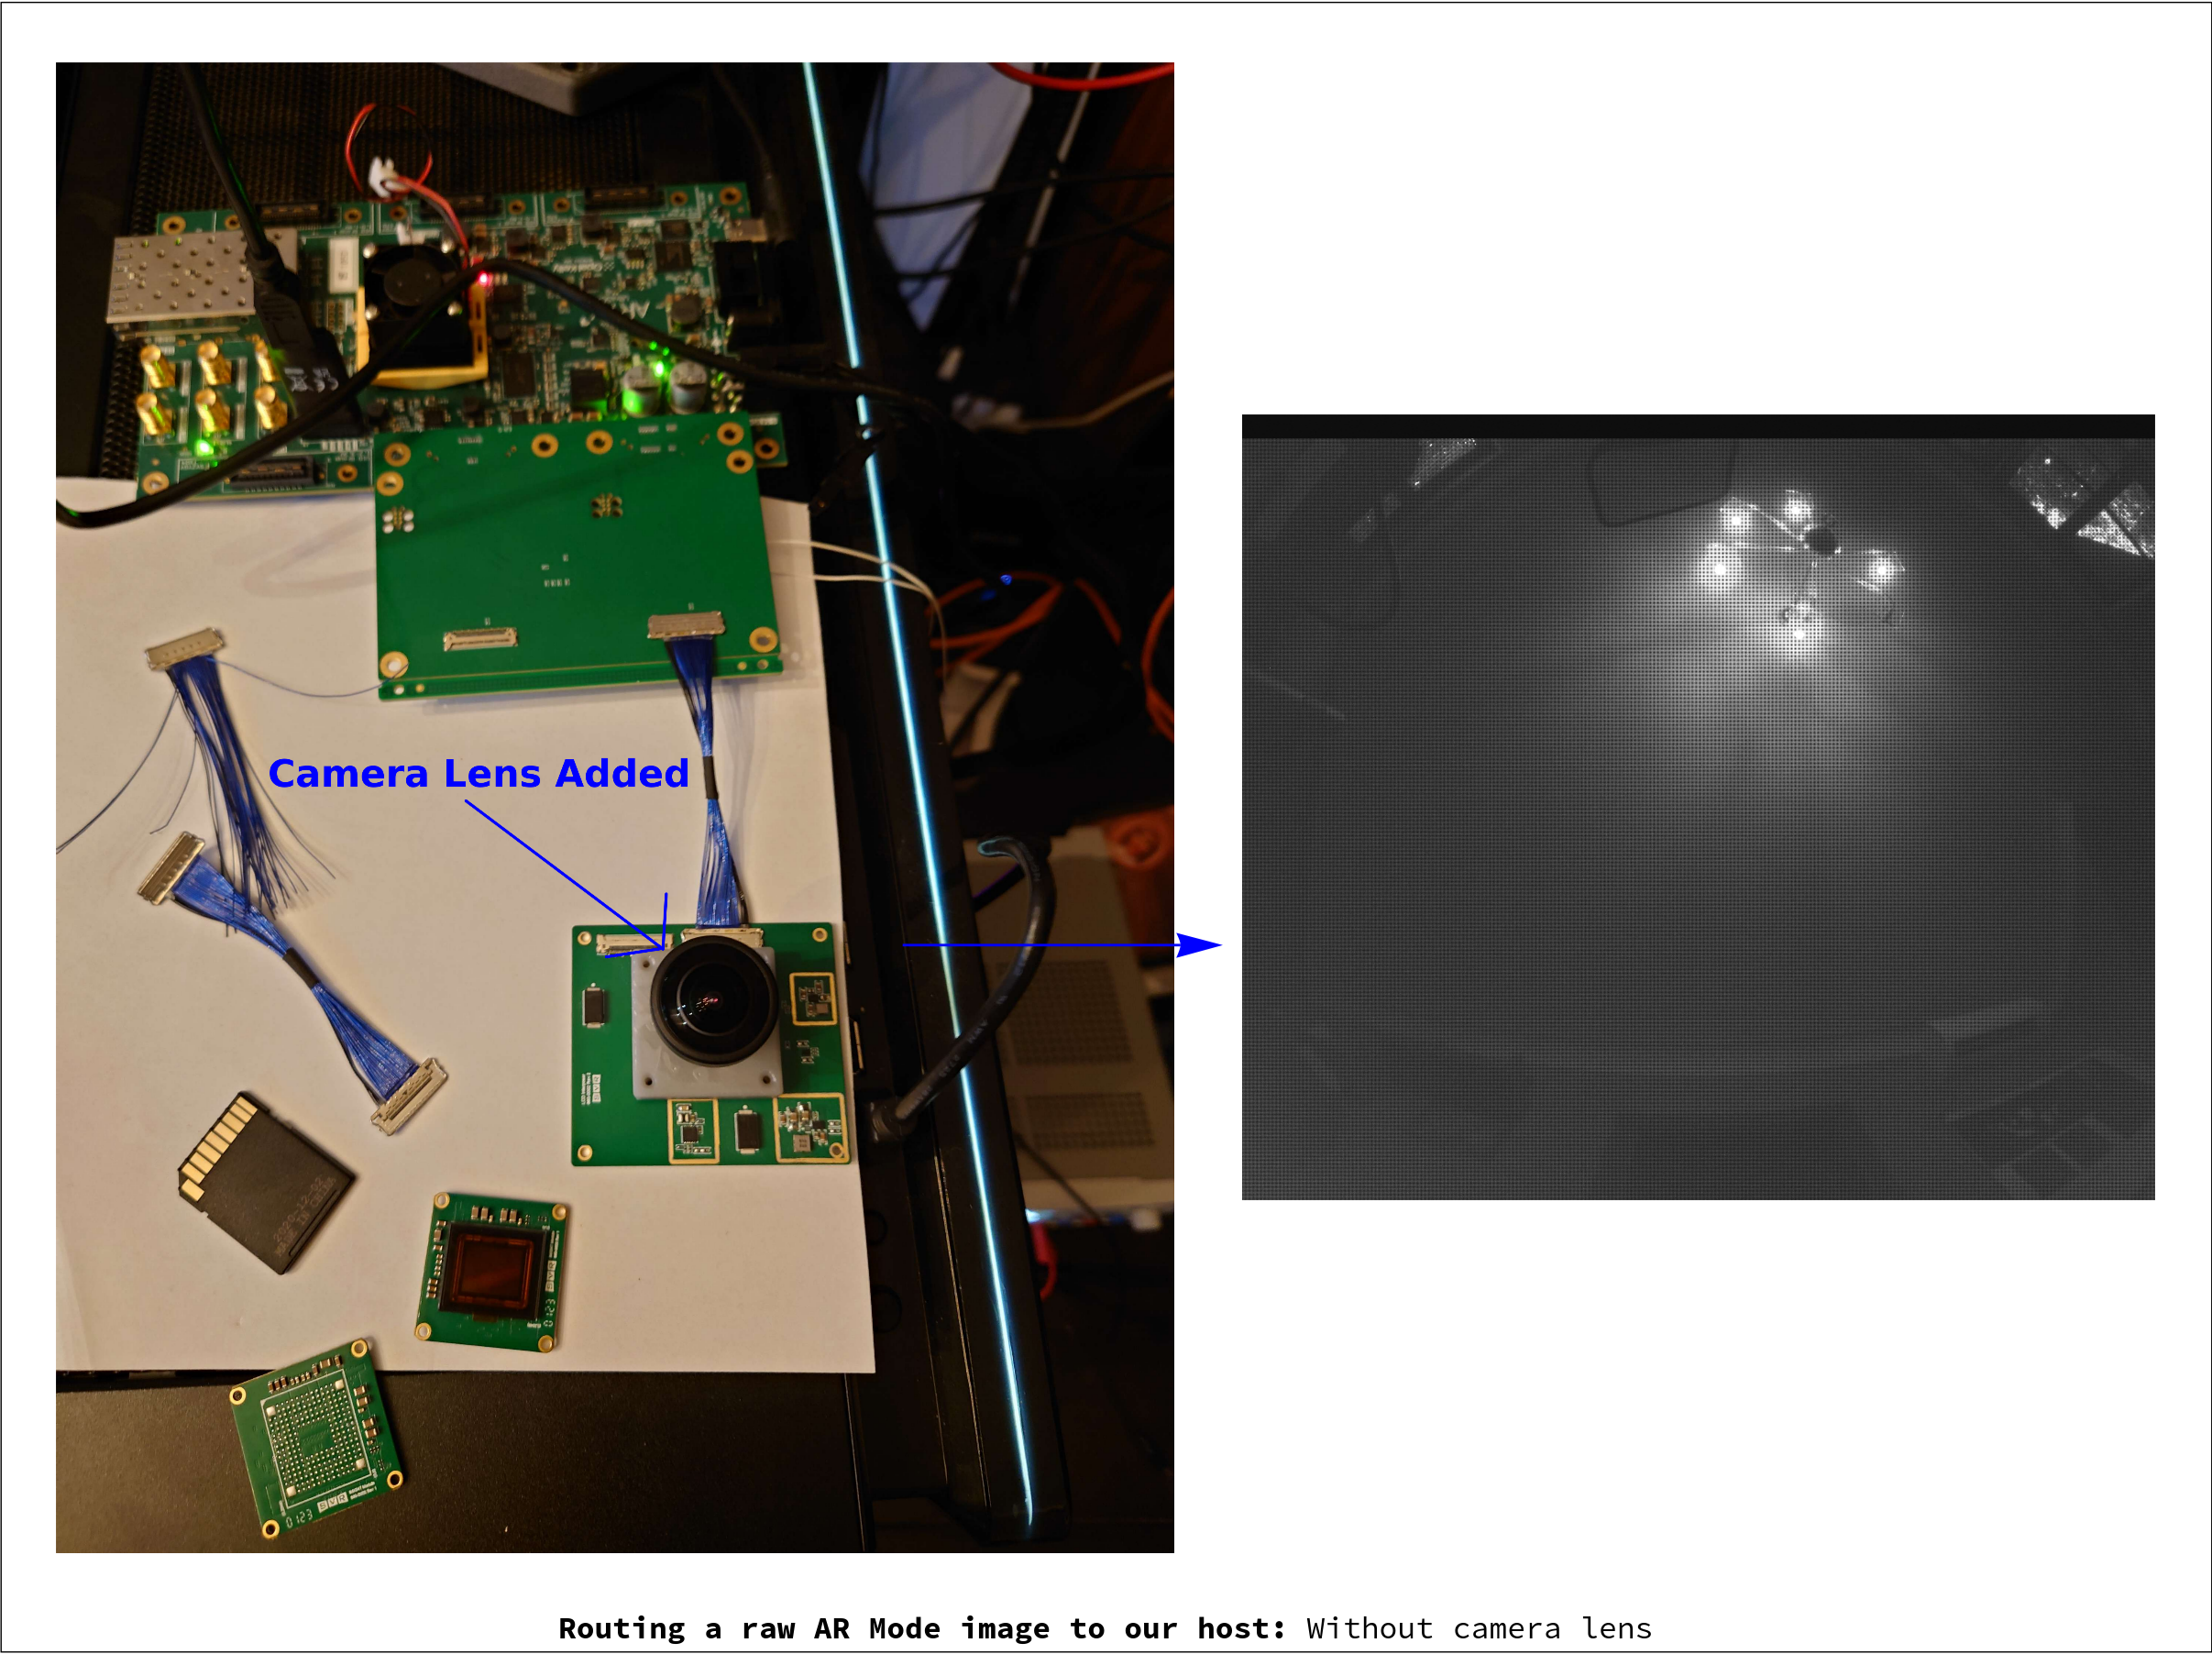
When we then add the camera lens over the sensor (and adjust some of the sensor's exposure settings), we get much clearer pictures:
Once the image is processed by the algorithms described above, it will provide for an enhanced & colorized image -- one suitable for Simula's AR Mode. We look forward to showing the finished product soon.