1 Progress on our compute pack
We've made substantial progress on Simula's VR/AR compute pack, which will eventually be shipped with Simula One headsets (and which we also want to sell as a standalone "VR/AR compatible laptop replacement computer", when we are able to afford to produce a larger batch of them; if you are interested in this, shoot me an email at georges@simulavr.com):
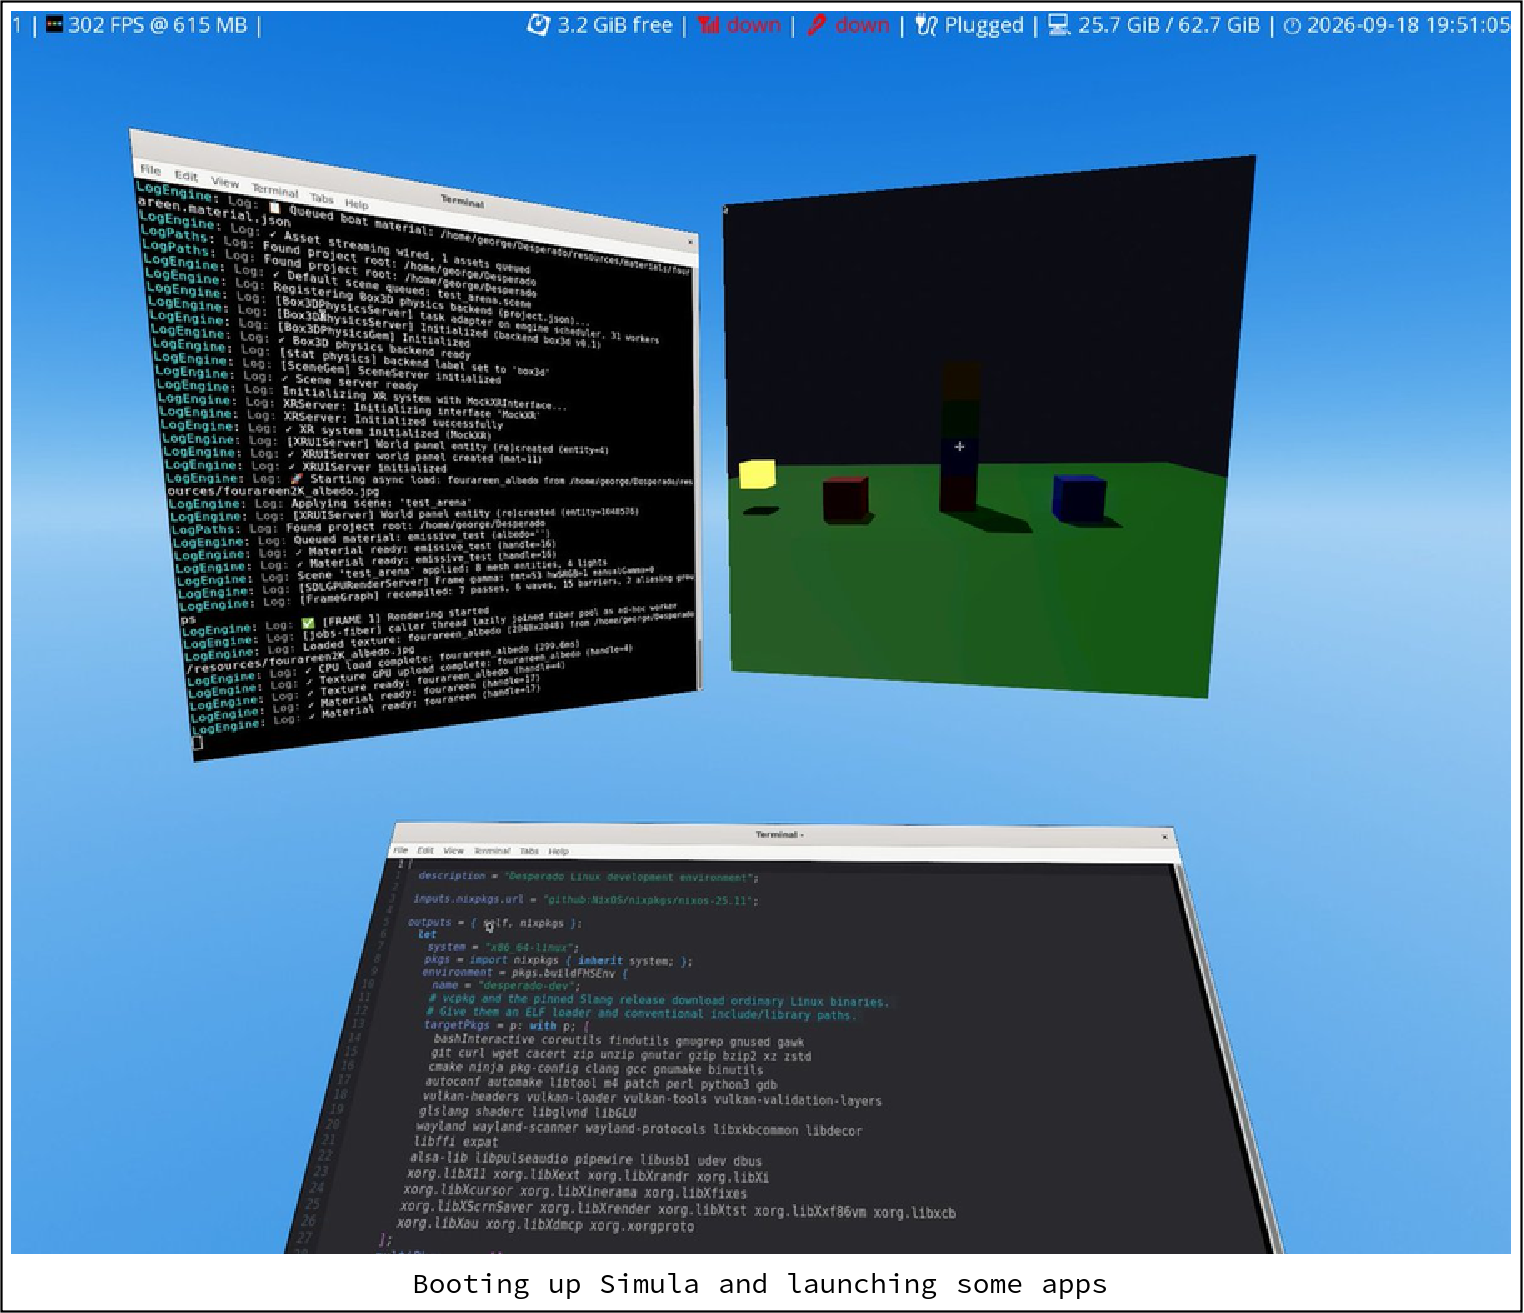
The compute pack itself comes with Simula pre-installed as a Linux VR distro (built over a NixOS flake), though it should be fairly easy to use whatever distro you want so long as you set Simula as its window manager.
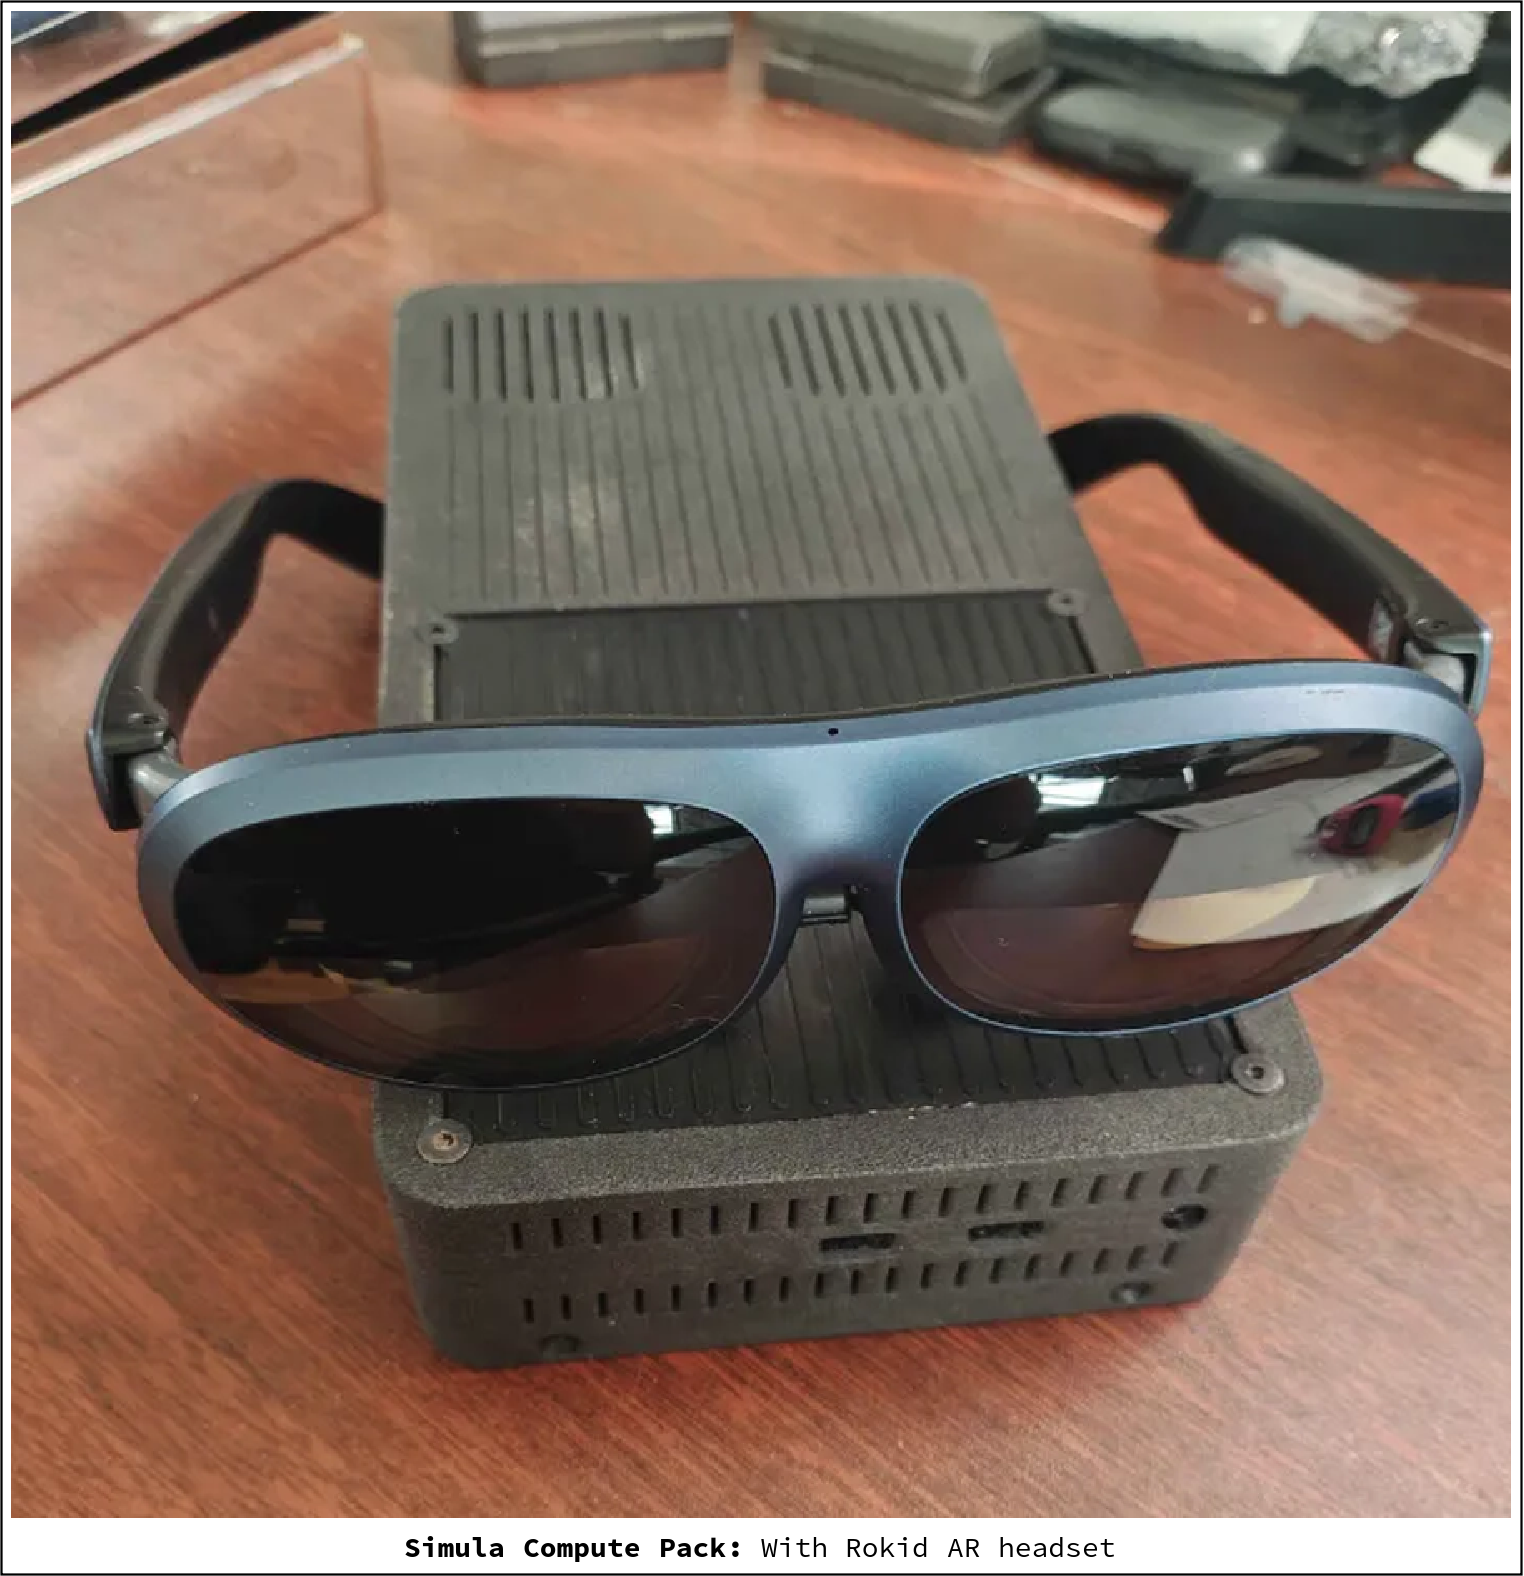
It also has plug-and-play compatibility with some of the existing AR headsets on the market (besides our own). We've been using a Rokid Air (with monado support) as our main test headset:
2 VR Computing = Portability
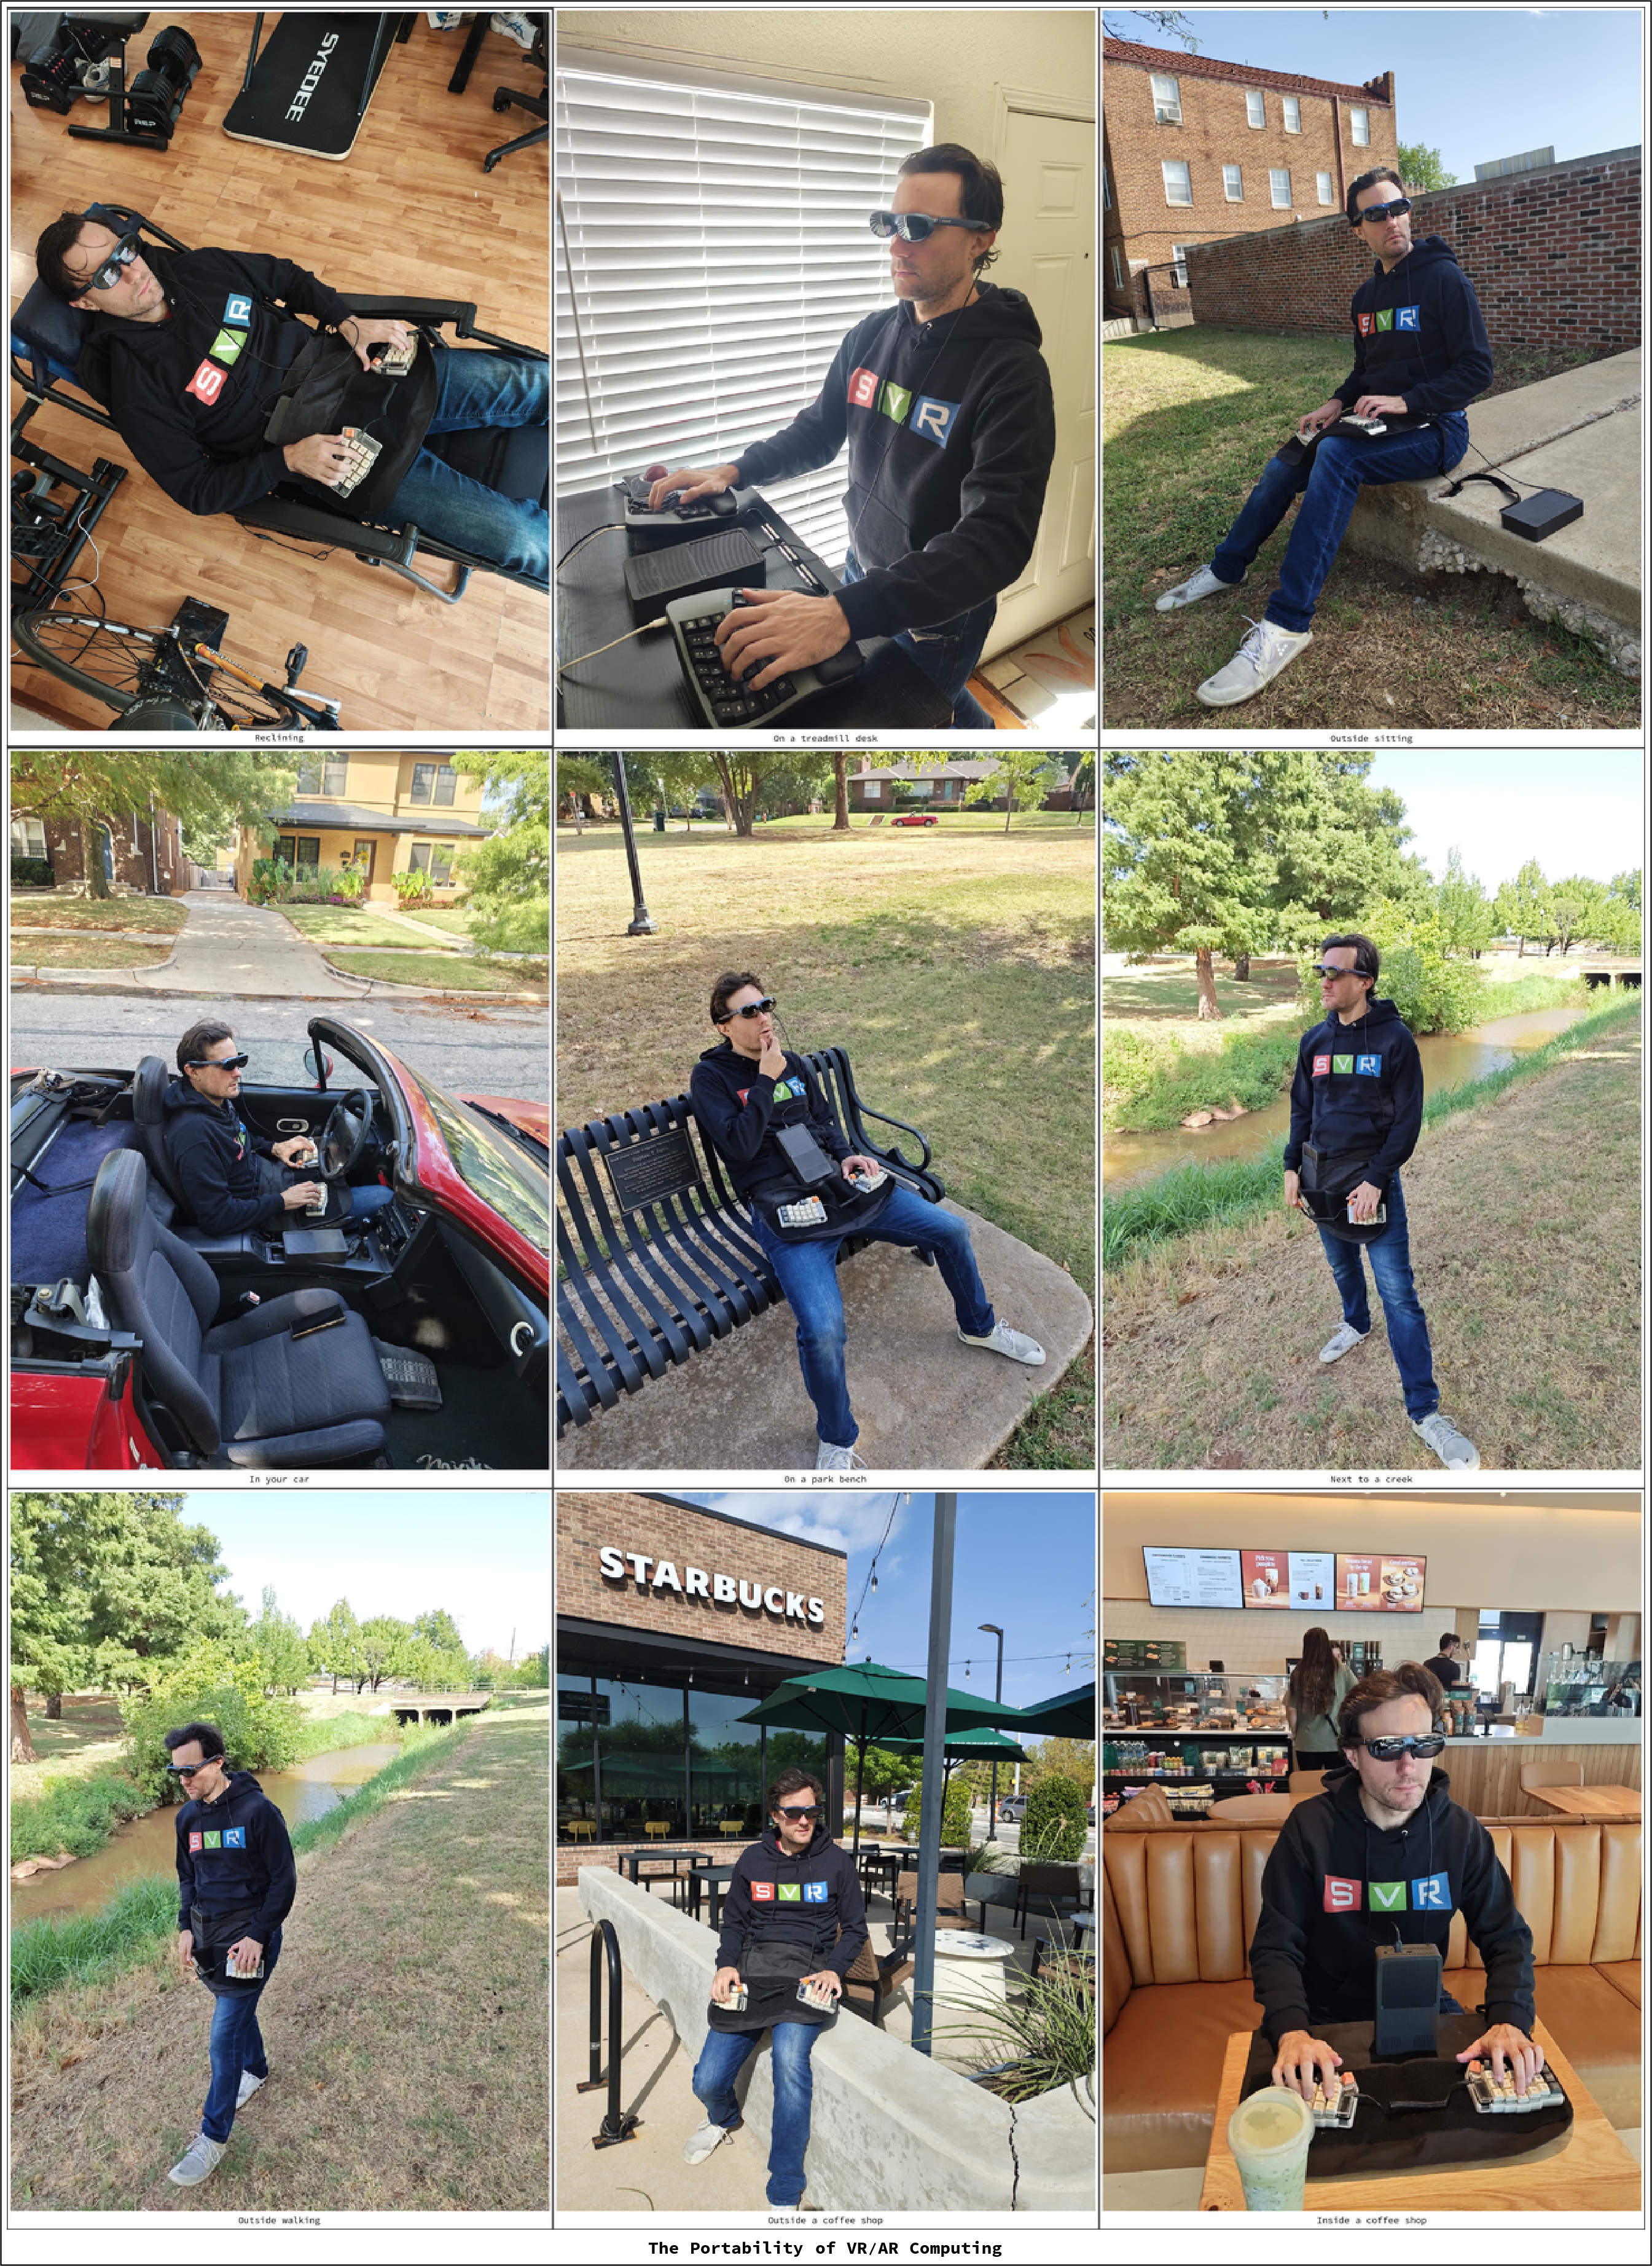
In our opinion, one of the coolest aspects of VR computing isbeing able to compute with the full power of your entire (private) desktop wherever you want, including during long walks outside or elsewhere:
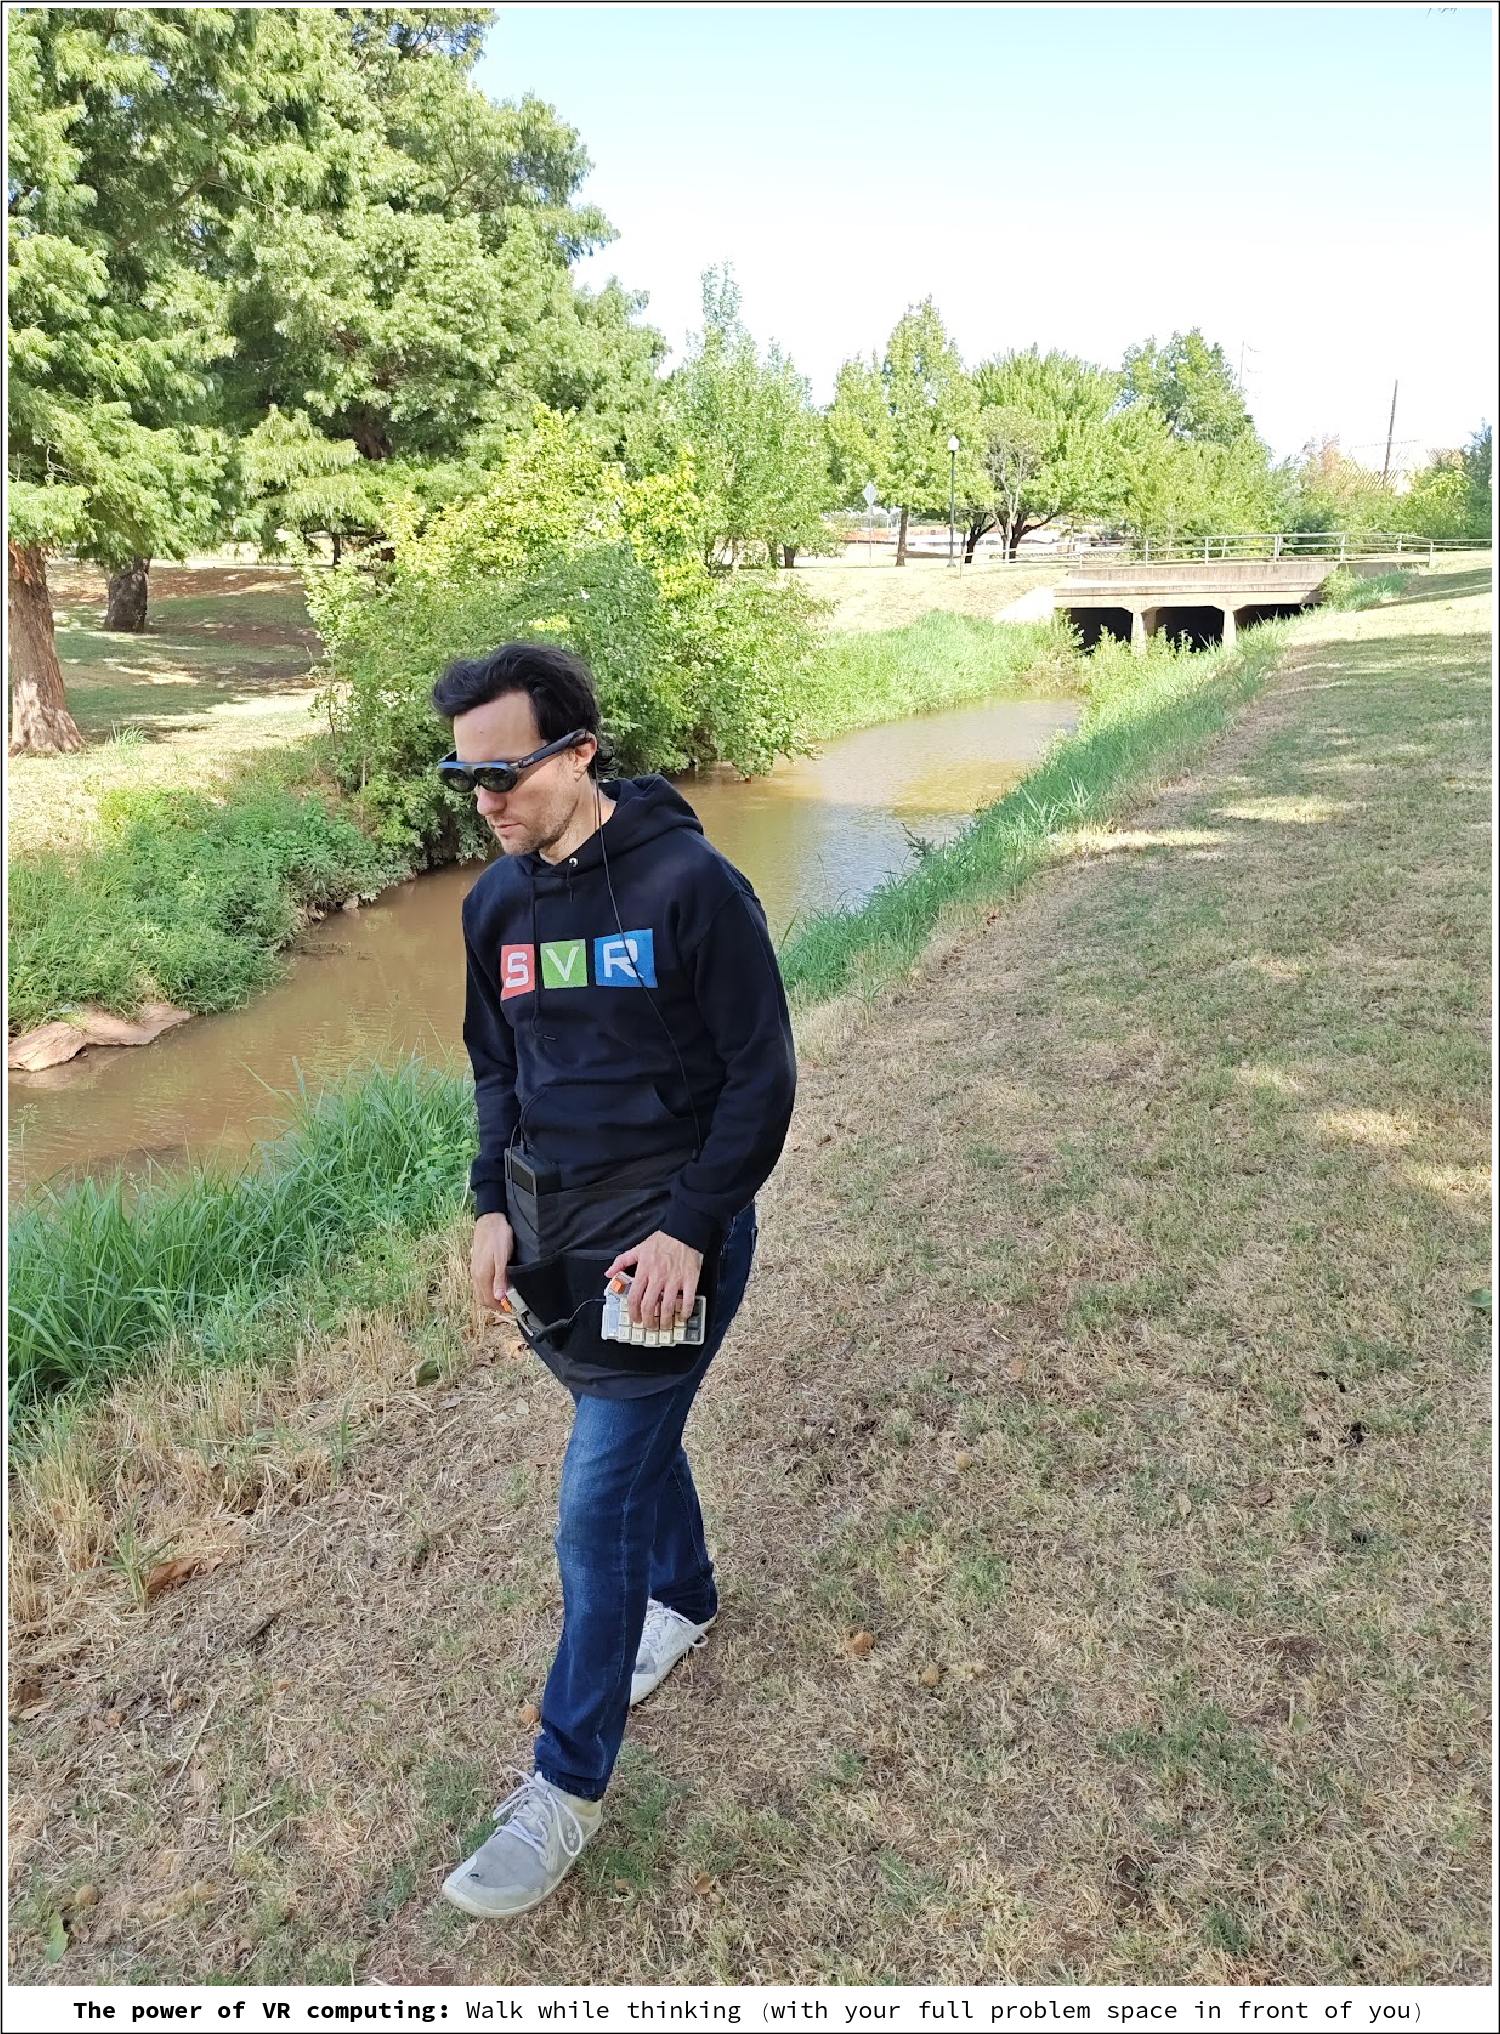
...so it's been very satisfying demoing Simula's portability in a bunch of different places:
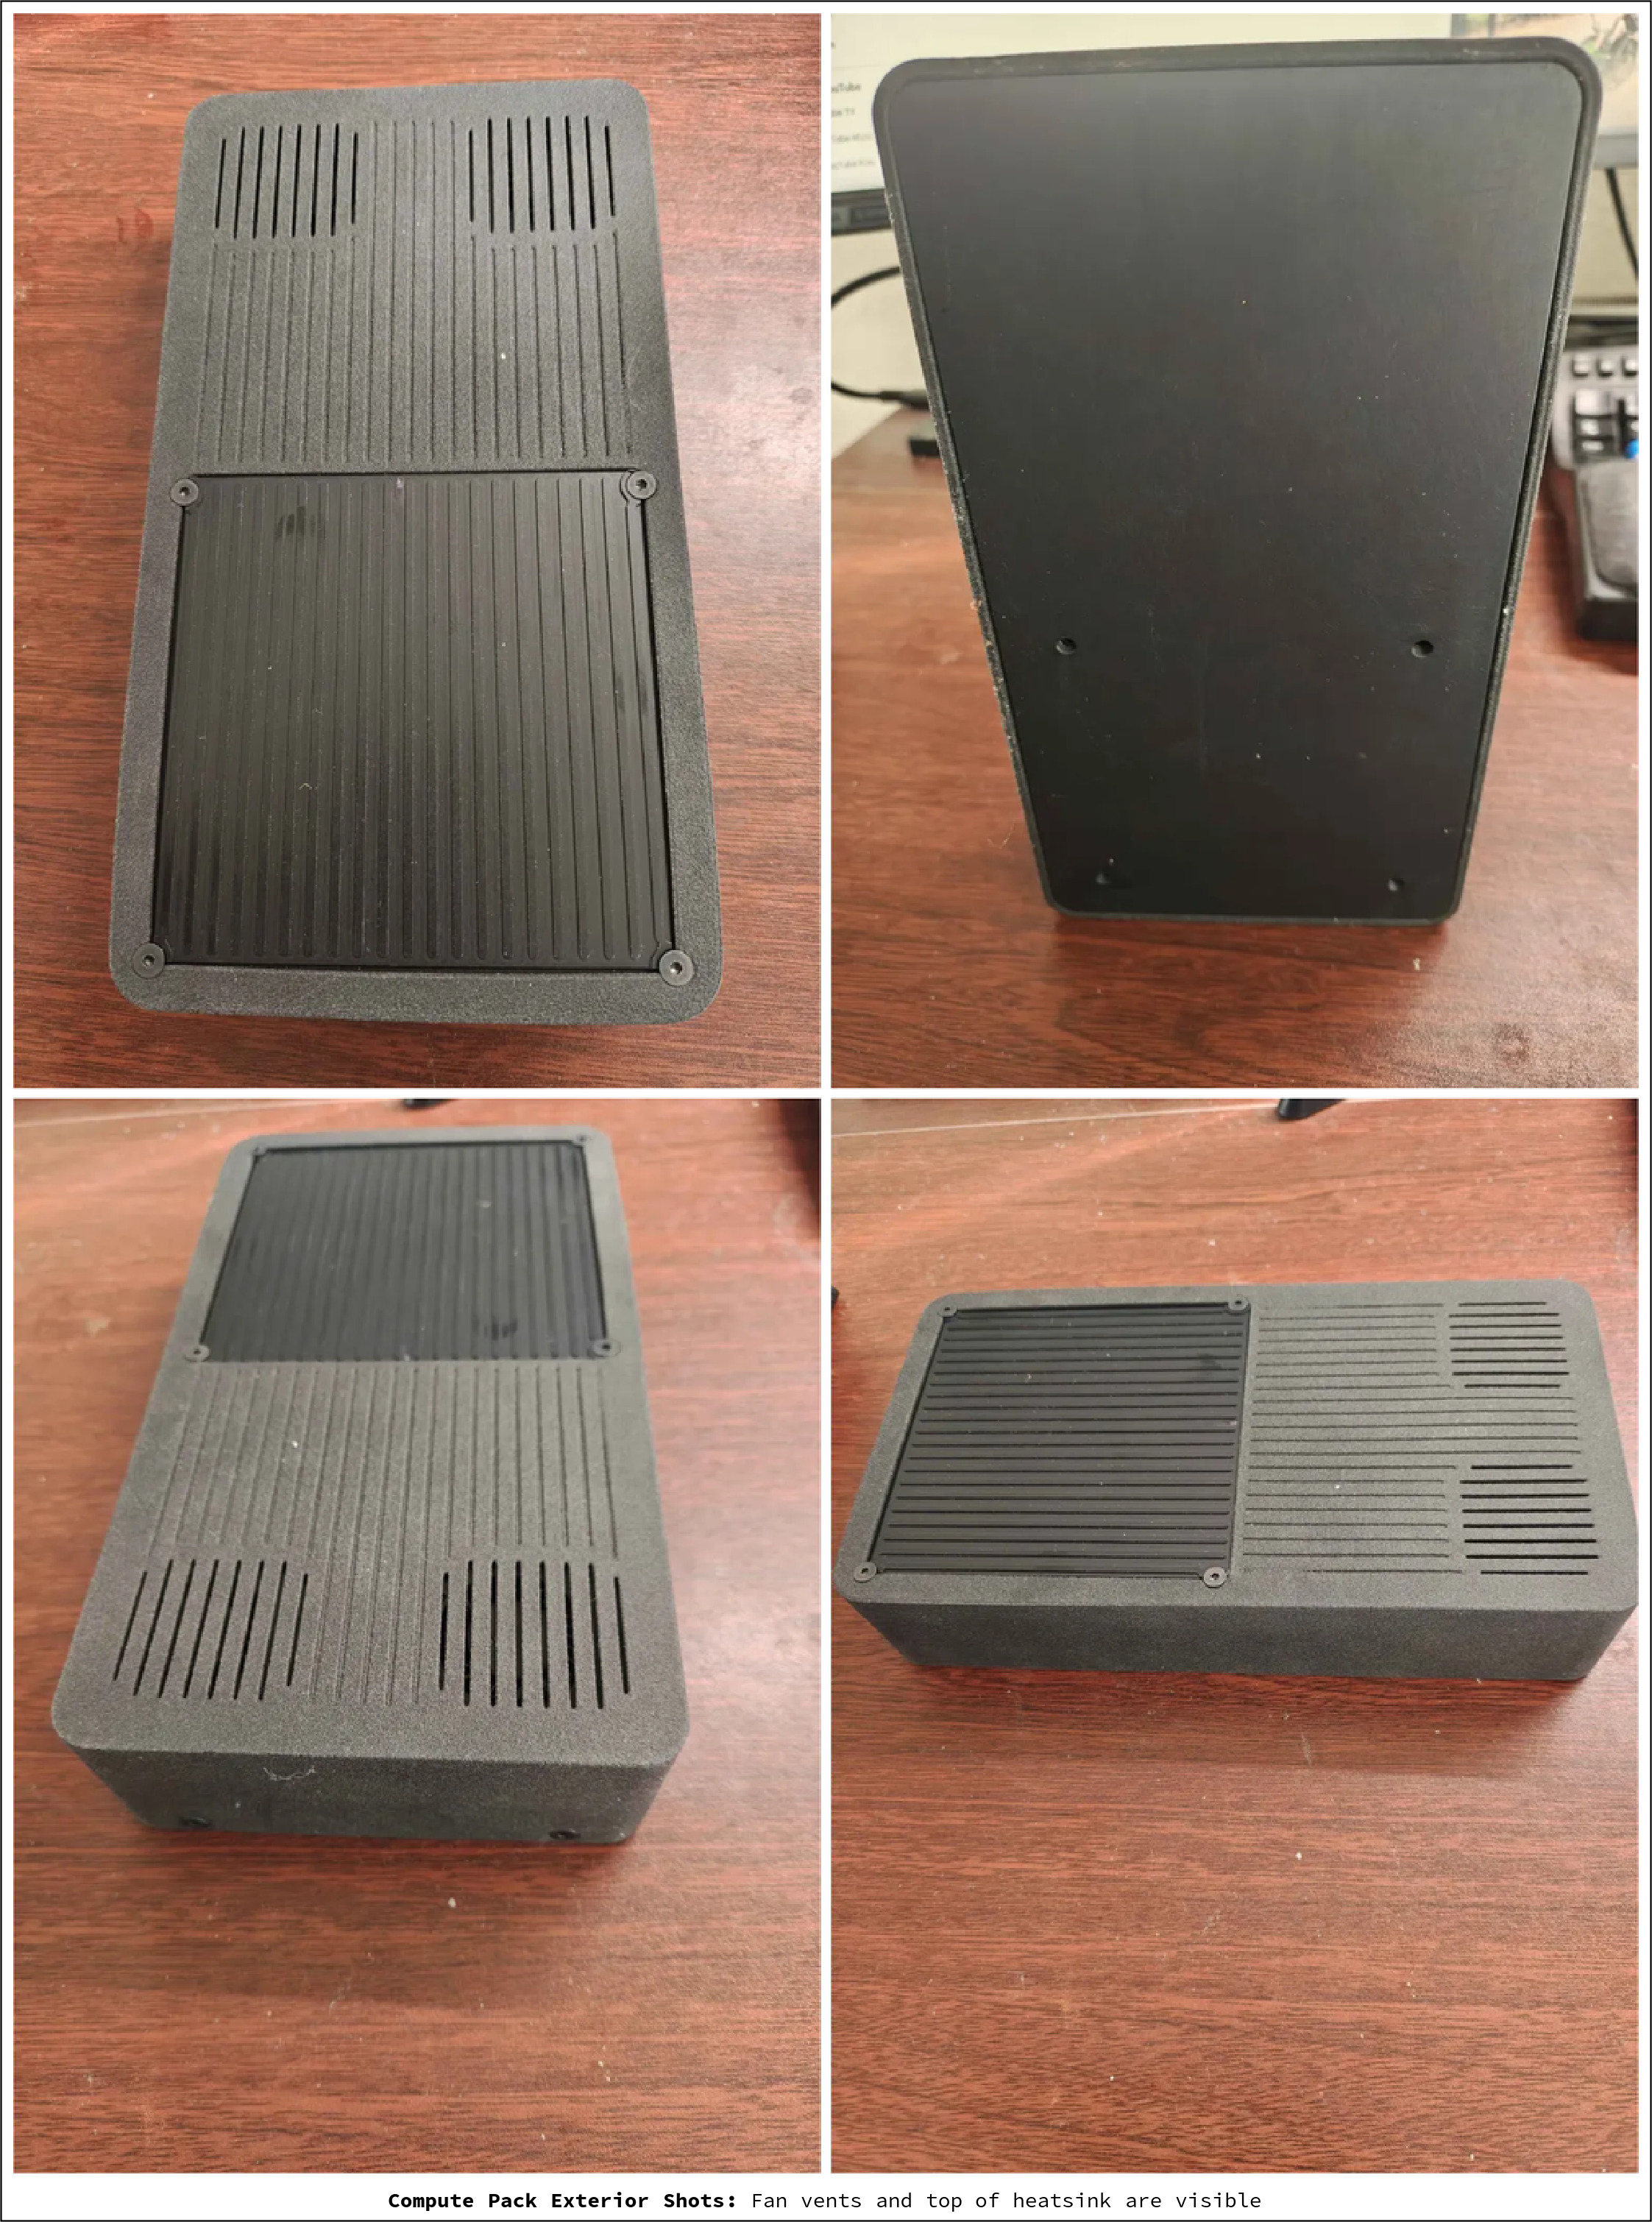
3 Compute Pack Exterior
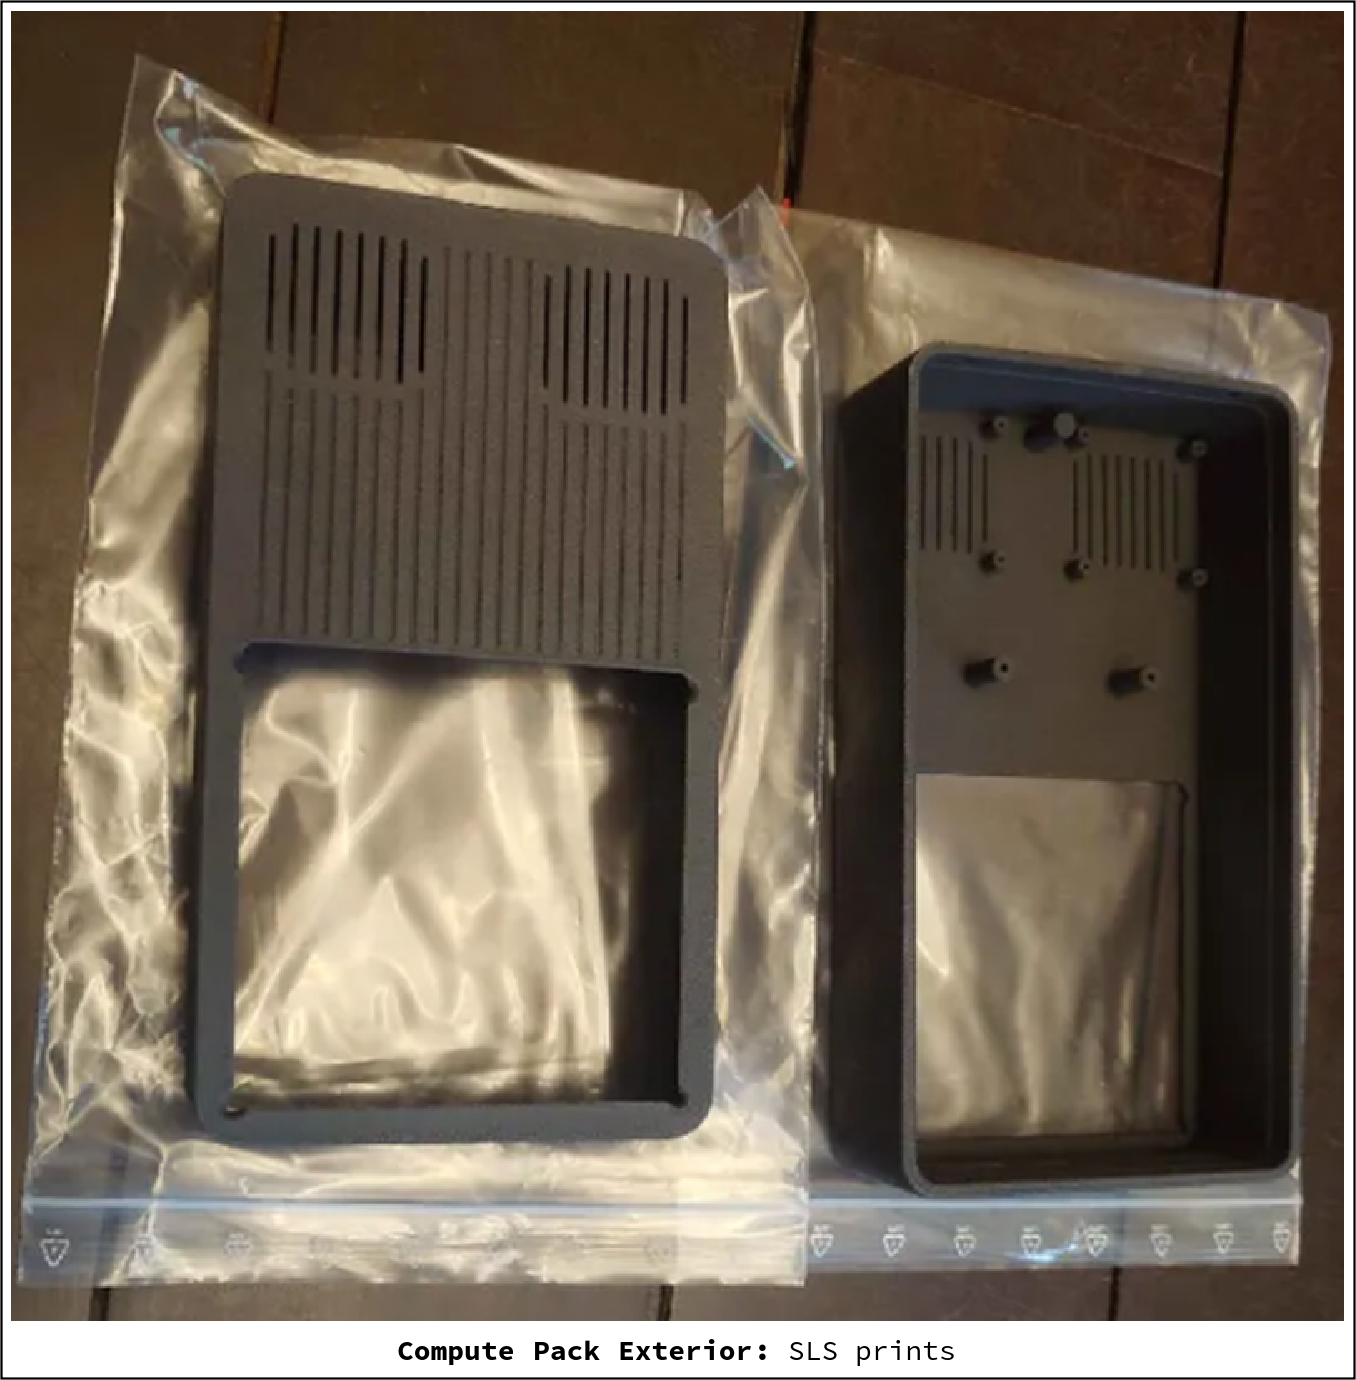
In terms of the exterior of the headset itself, this particular one was SLS printed:
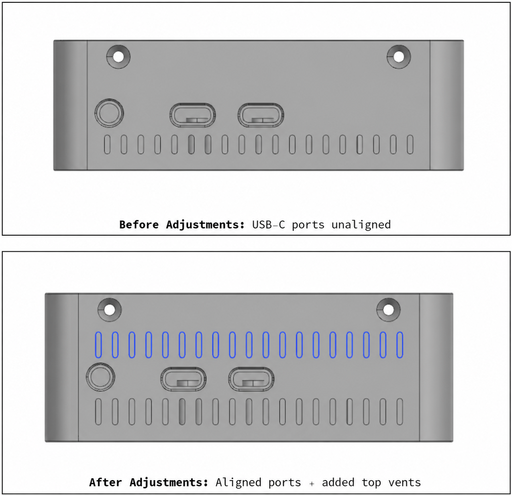
and came as a result of some height adjustments we made to better align ports:
The final iteration will be a bit shorter depth-wise than this one, depending upon the adjustments we make to the heatsink (see below).
4 Compute Pack Interior
4.1 Onboard Computer
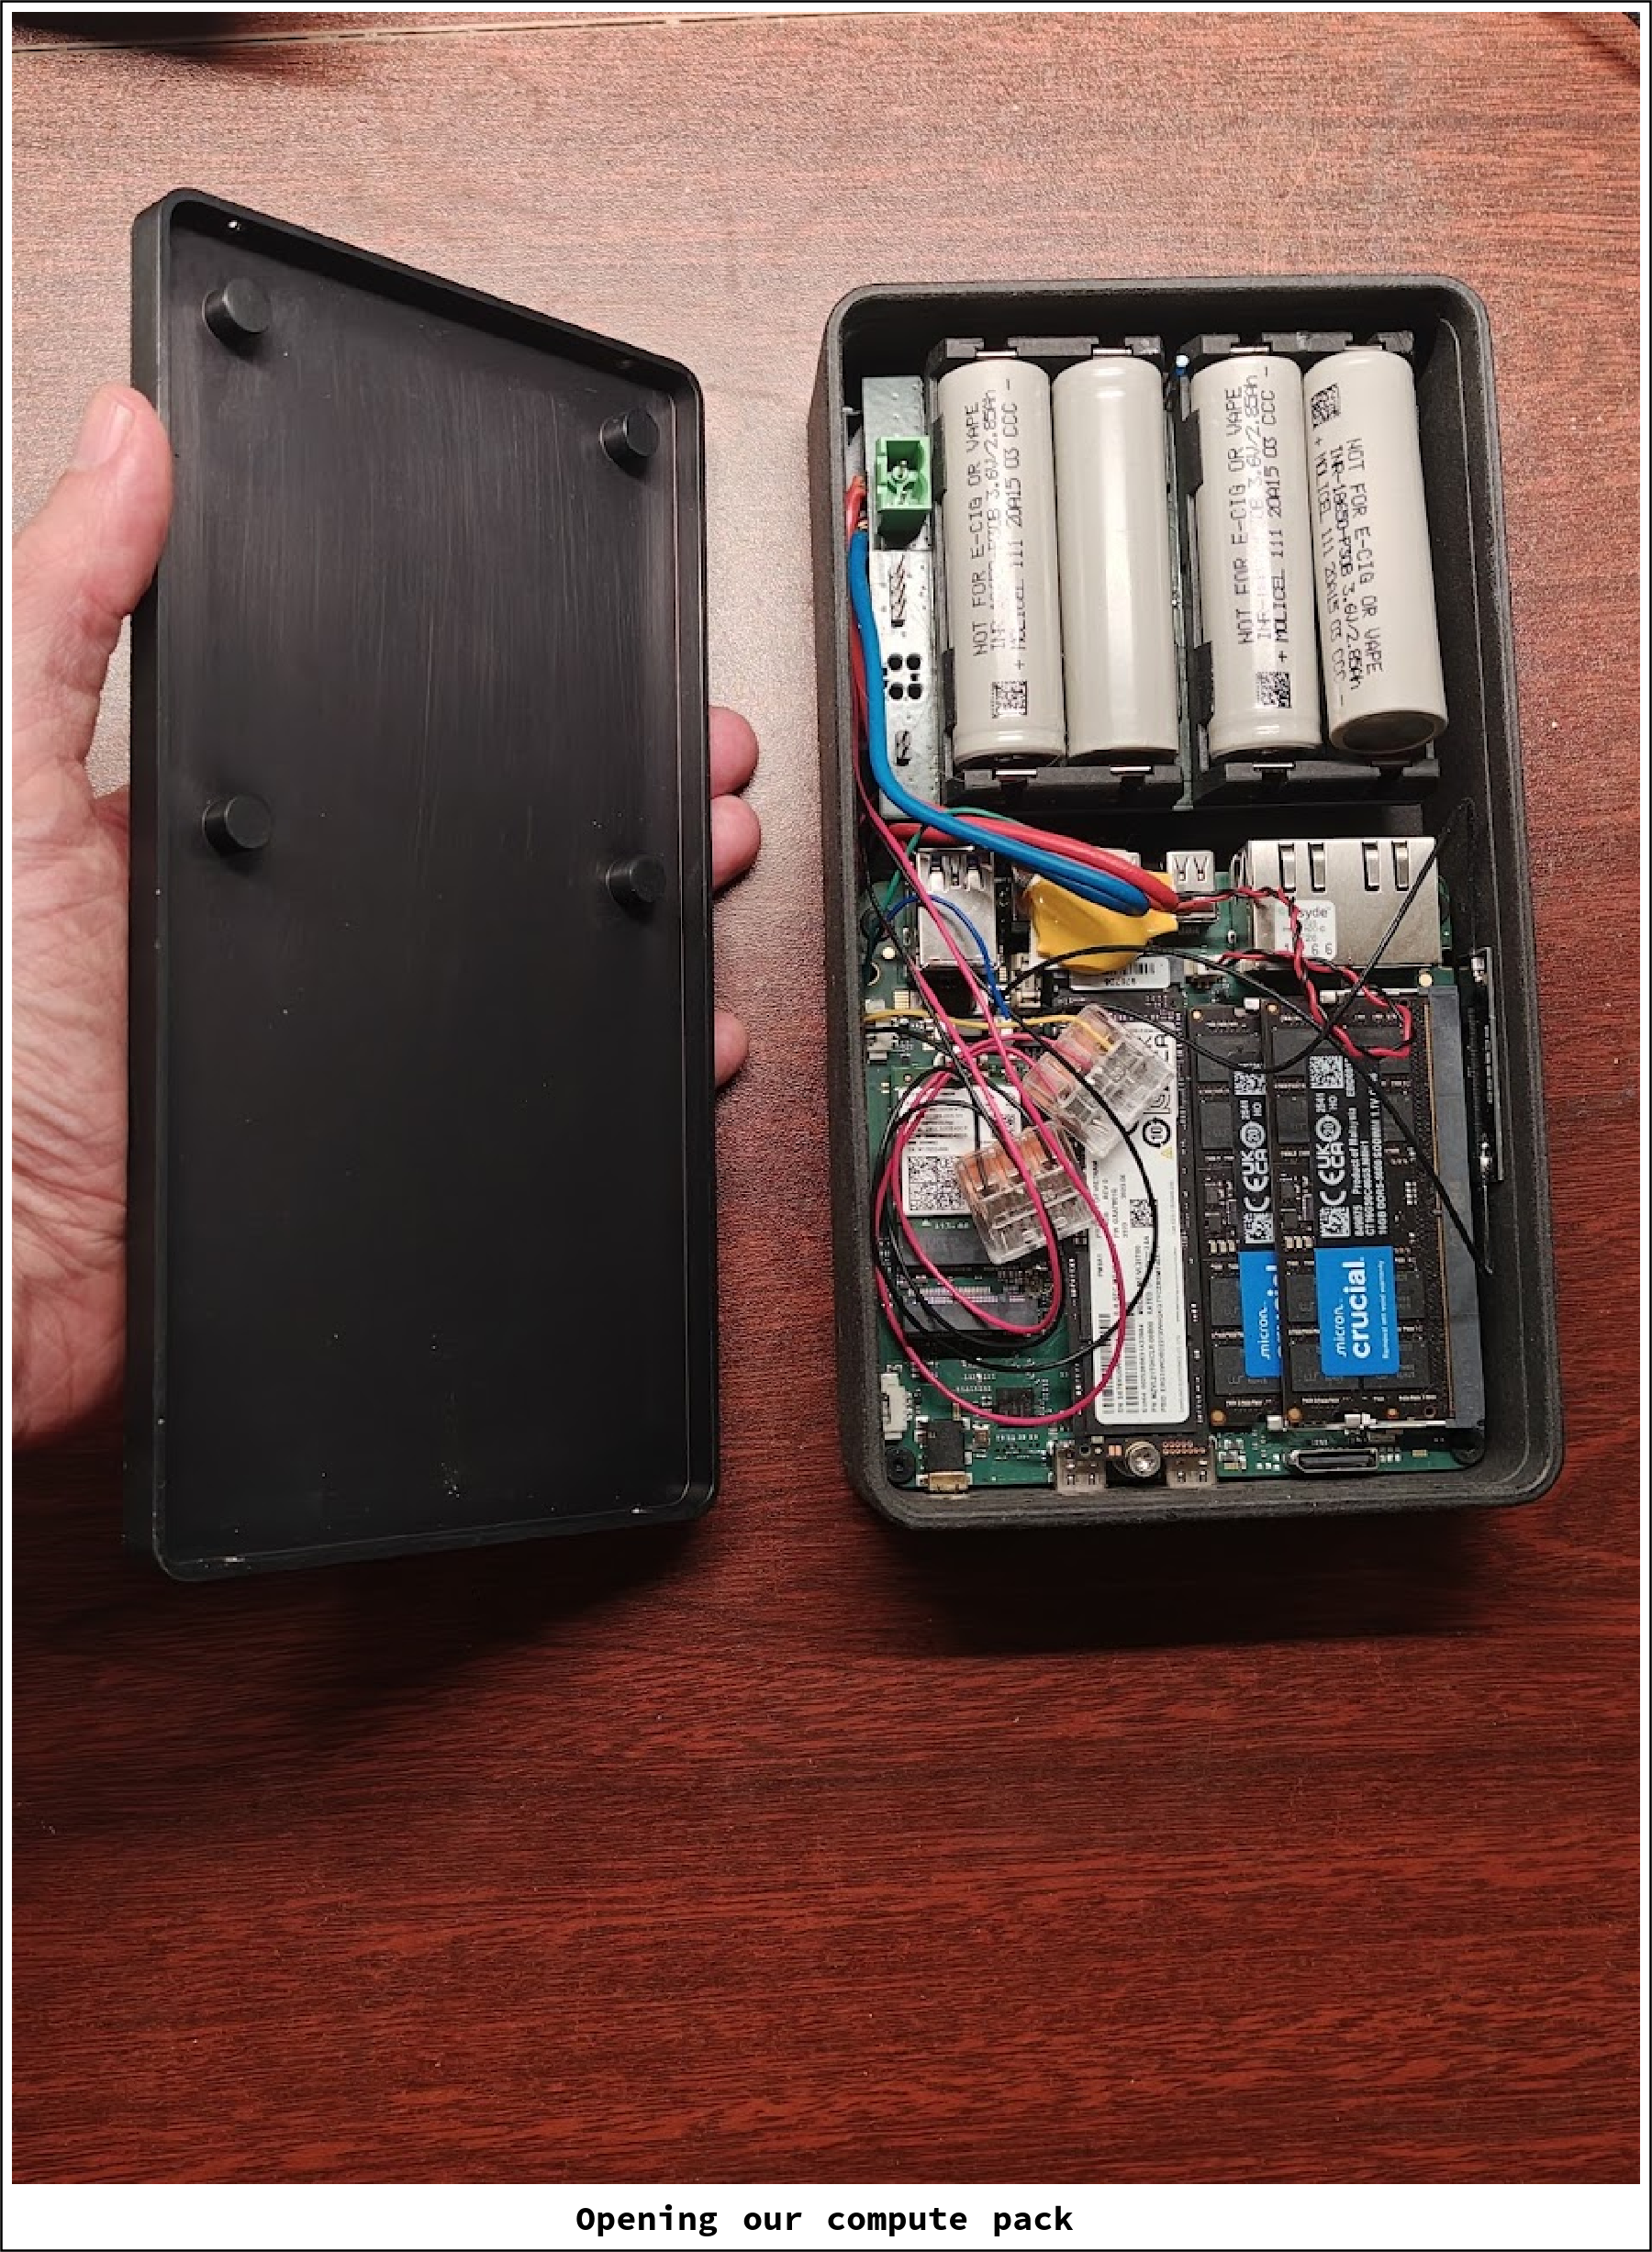
The interiors of our compute pack is built around a Ryzen 8840U EEPD NUC, with the following specs:
| NUCU (AMD Ryzen™ Embedded 8840U) | |
|---|---|
| Manufacturer | EEPD |
| Platform | Linux |
| CPU | Ryzen 7 8840U |
| Cores | 8 |
| Threads | 16 |
| TDP | 15W - 30W |
| CPU Frequency | 3.3GHz - 5.1GHz |
| Memory | Two sockets (2x16GB DDR5-5600 in our unit) |
| RAM Frequency | 5600 MT/s |
| RAM Transfer Speed | 87.5 GB/s |
| GPU | AMD RDNA3 Radeon Graphics |
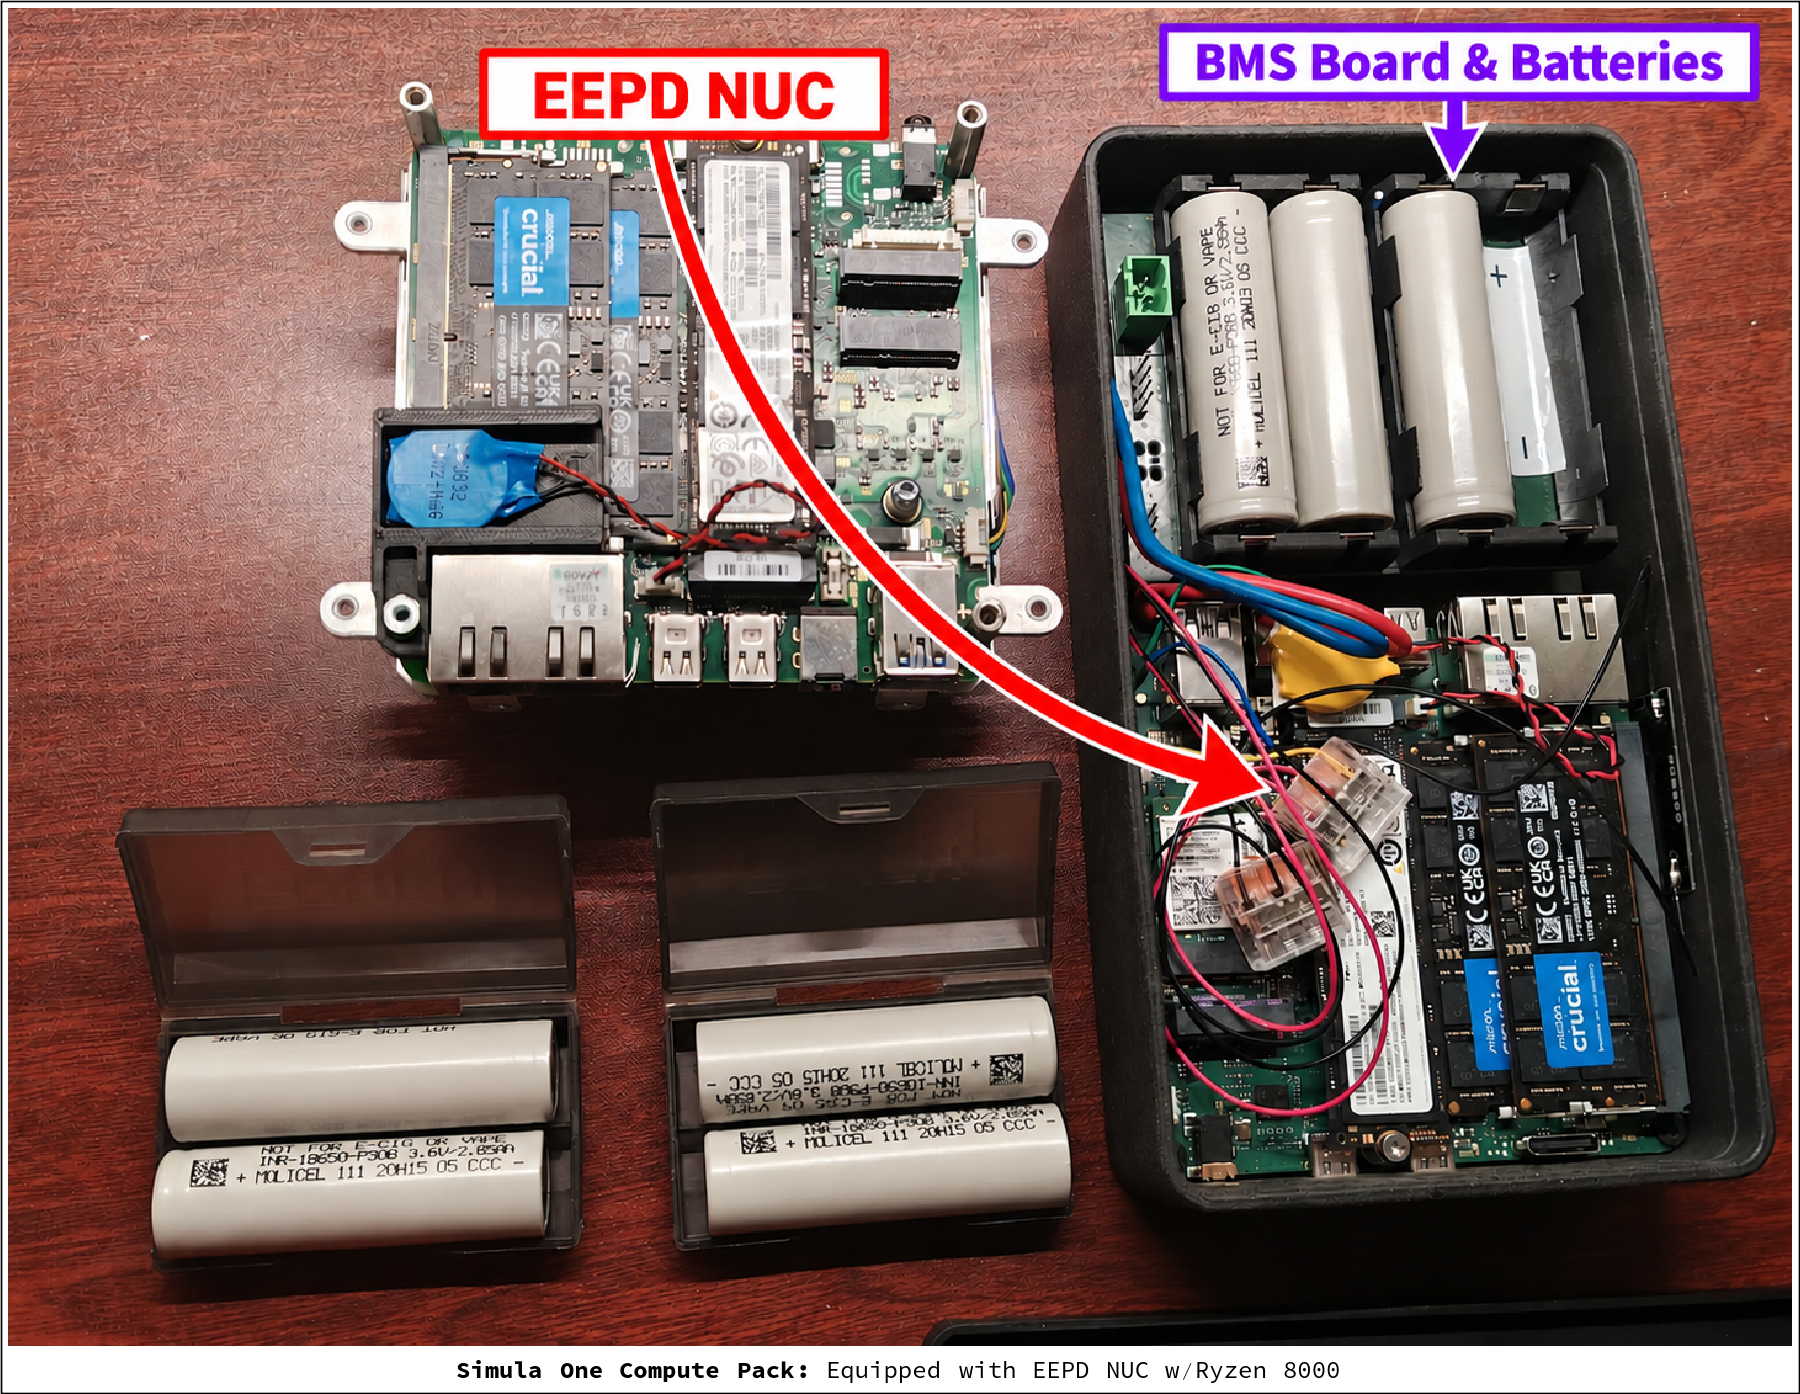
4.2 Battery Management System ("BMS")
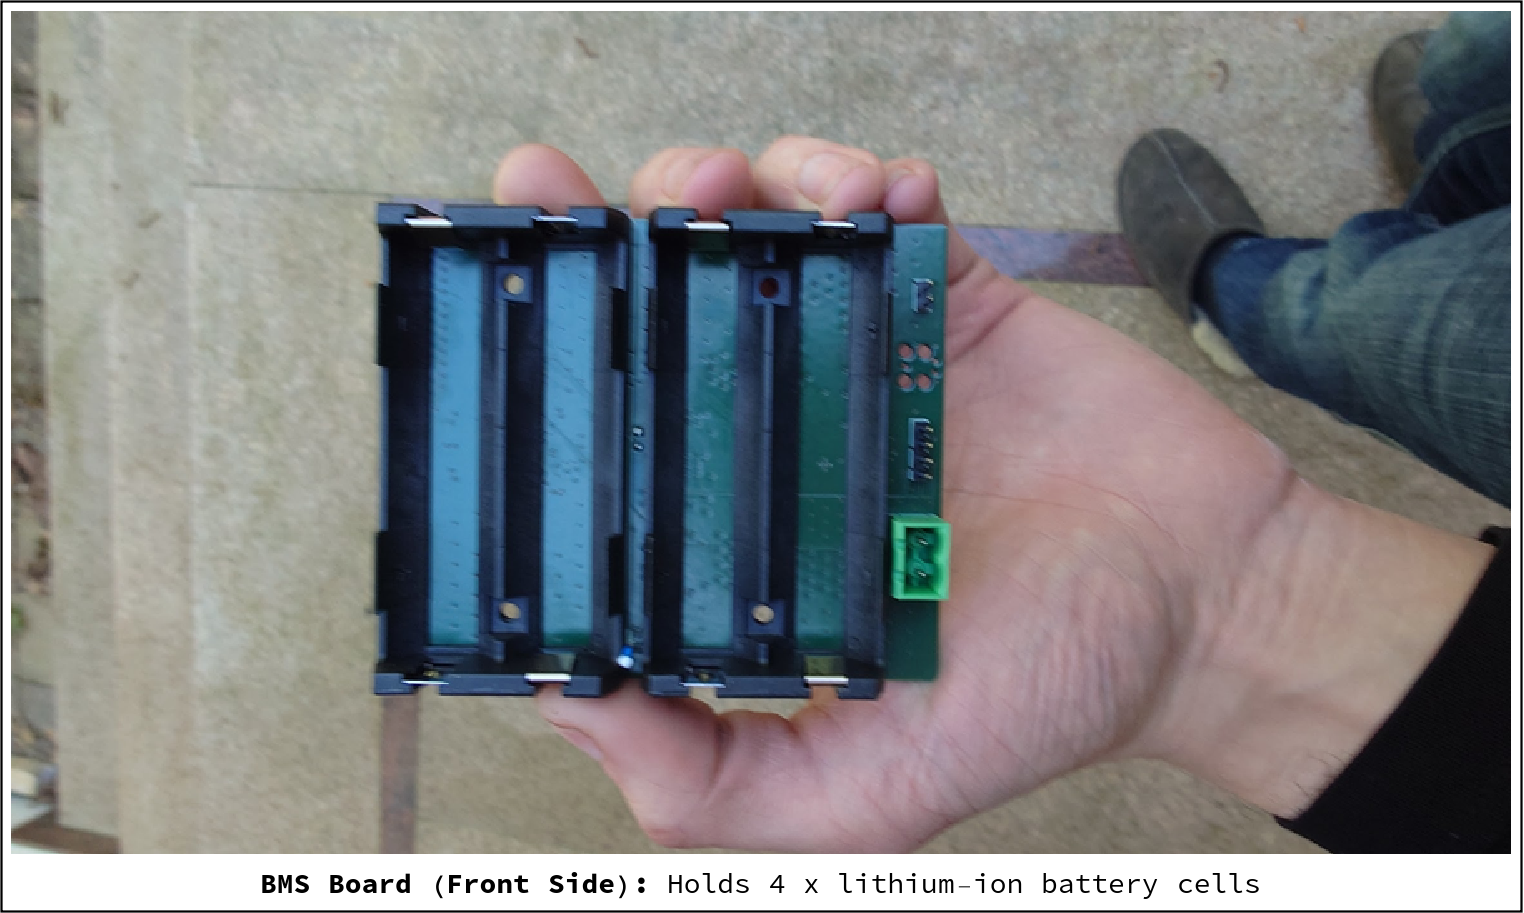
Our own custom BMS Board (whose assets/code can be found https://github.com/SimulaVR/BMSBoard) carries two battery holders, for a total of four 18650 lithium-ion cells on its front side:
On its back side, it contains chips to monitor and protect the battery cells:
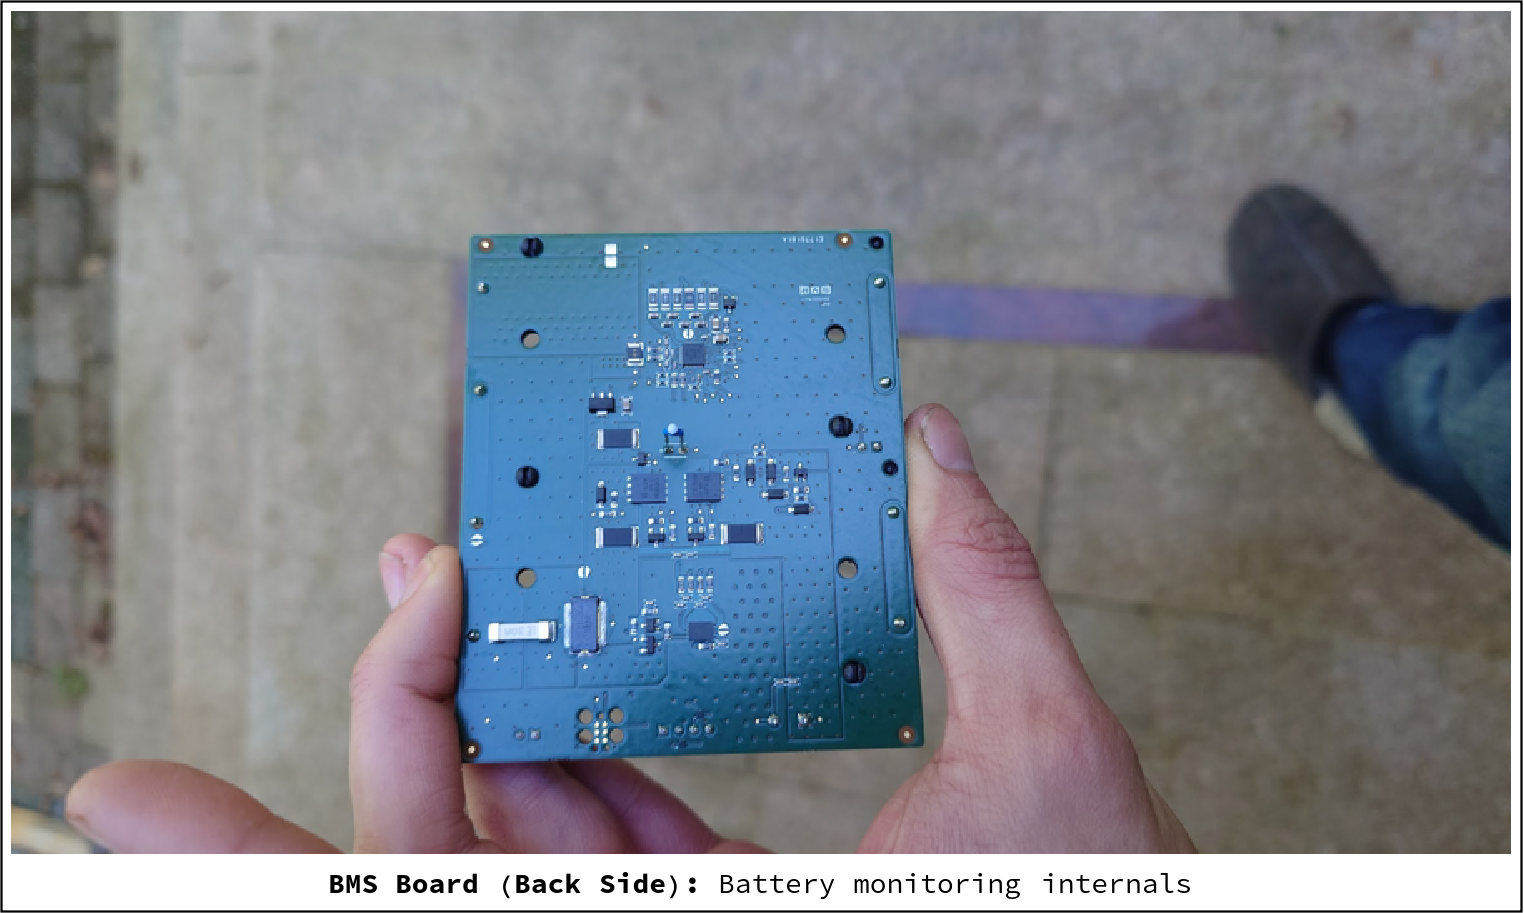
In particular:
-
A TI BQ76922 (battery-management chip) monitors the individual cell voltages, current, and temperature while balancing the charge across the 4 battery cells.
-
A separate TI BQ771807 provides overvoltage protection (shutting off the charging path if a cell exceeds its voltage threshold), while two temperature sensors check whether the battery cells are getting too hot.
4.2.1 Still Remaining: Direct Charger Integration
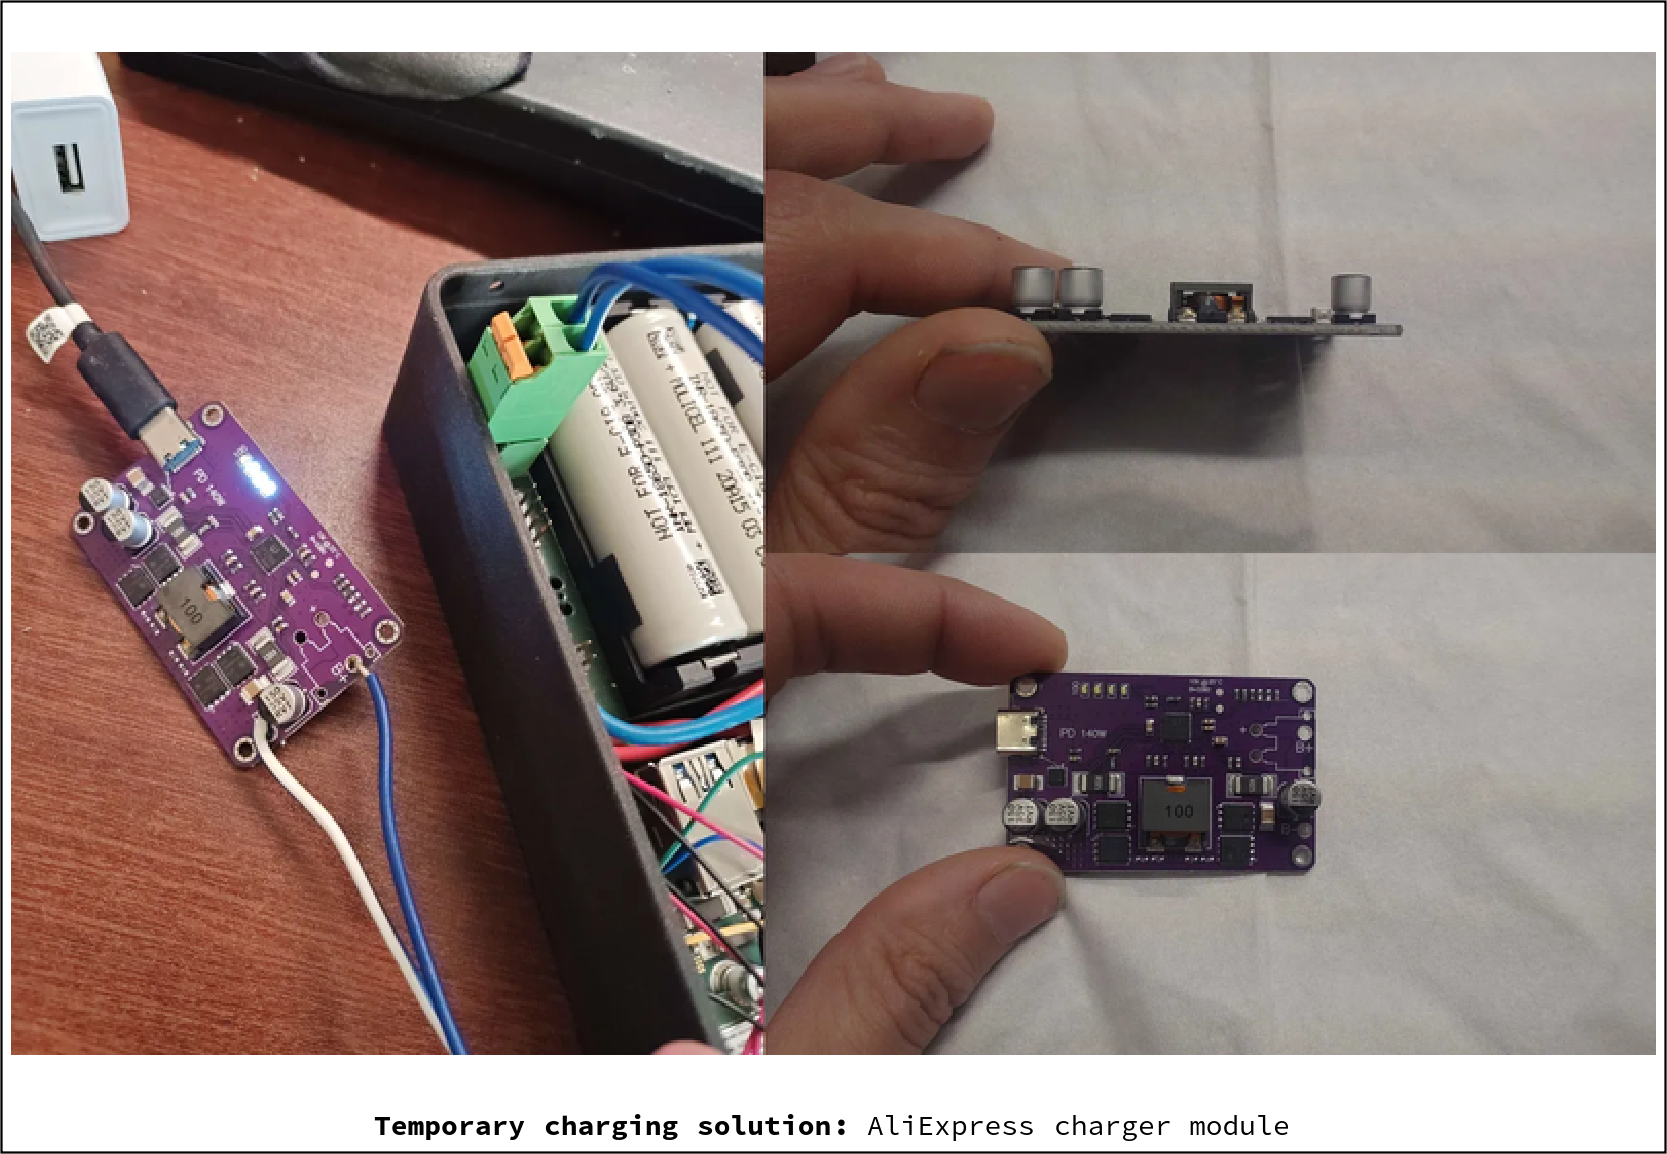
Our BMS board is still missing direct charger integration. Currently we've been using an off-the-shelf component for this:
With that said, the next BMS revision is ready for testing (it just hasn't been assembled yet):
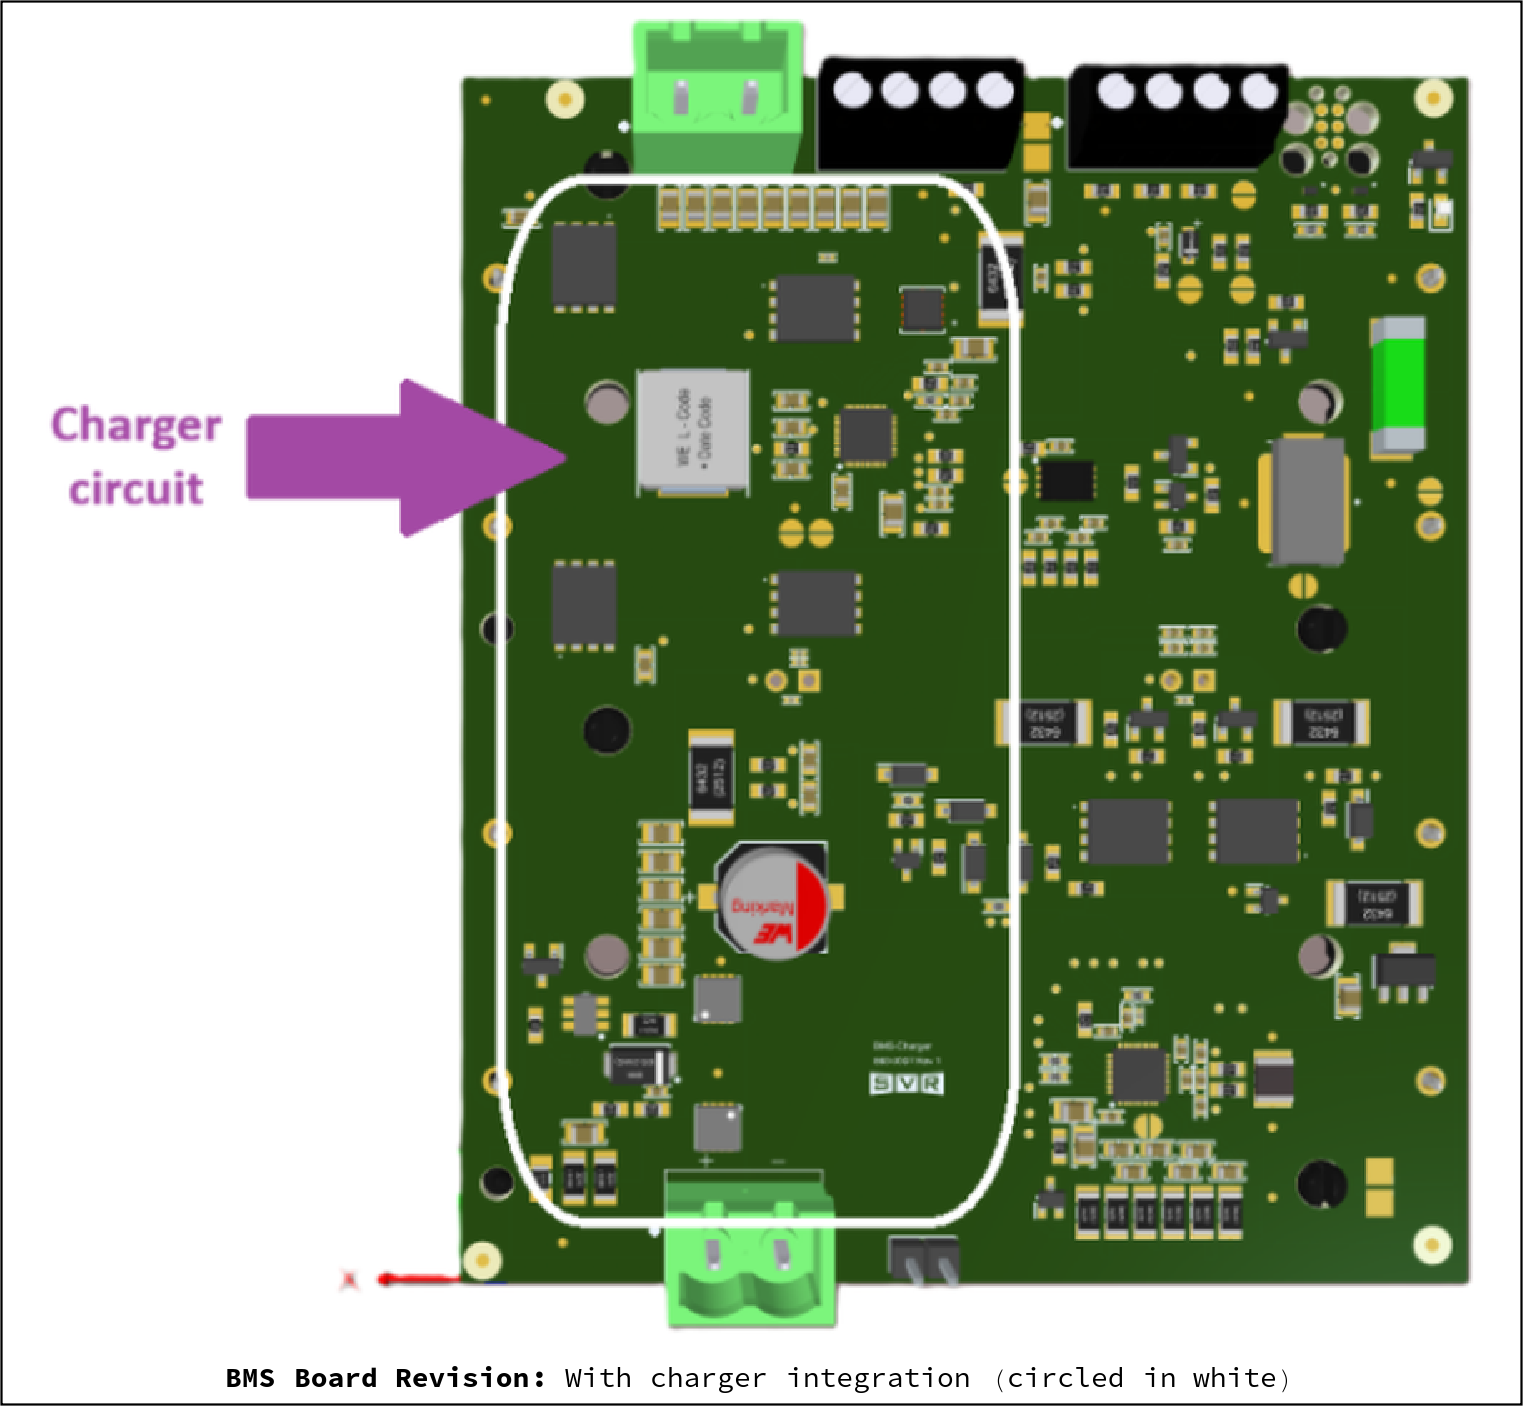
It integrates a TI BQ25713 buck-boost charger and keeps the entire combined BMS + charging module at the current dimensions of our BMS board.
4.3 Cooling System
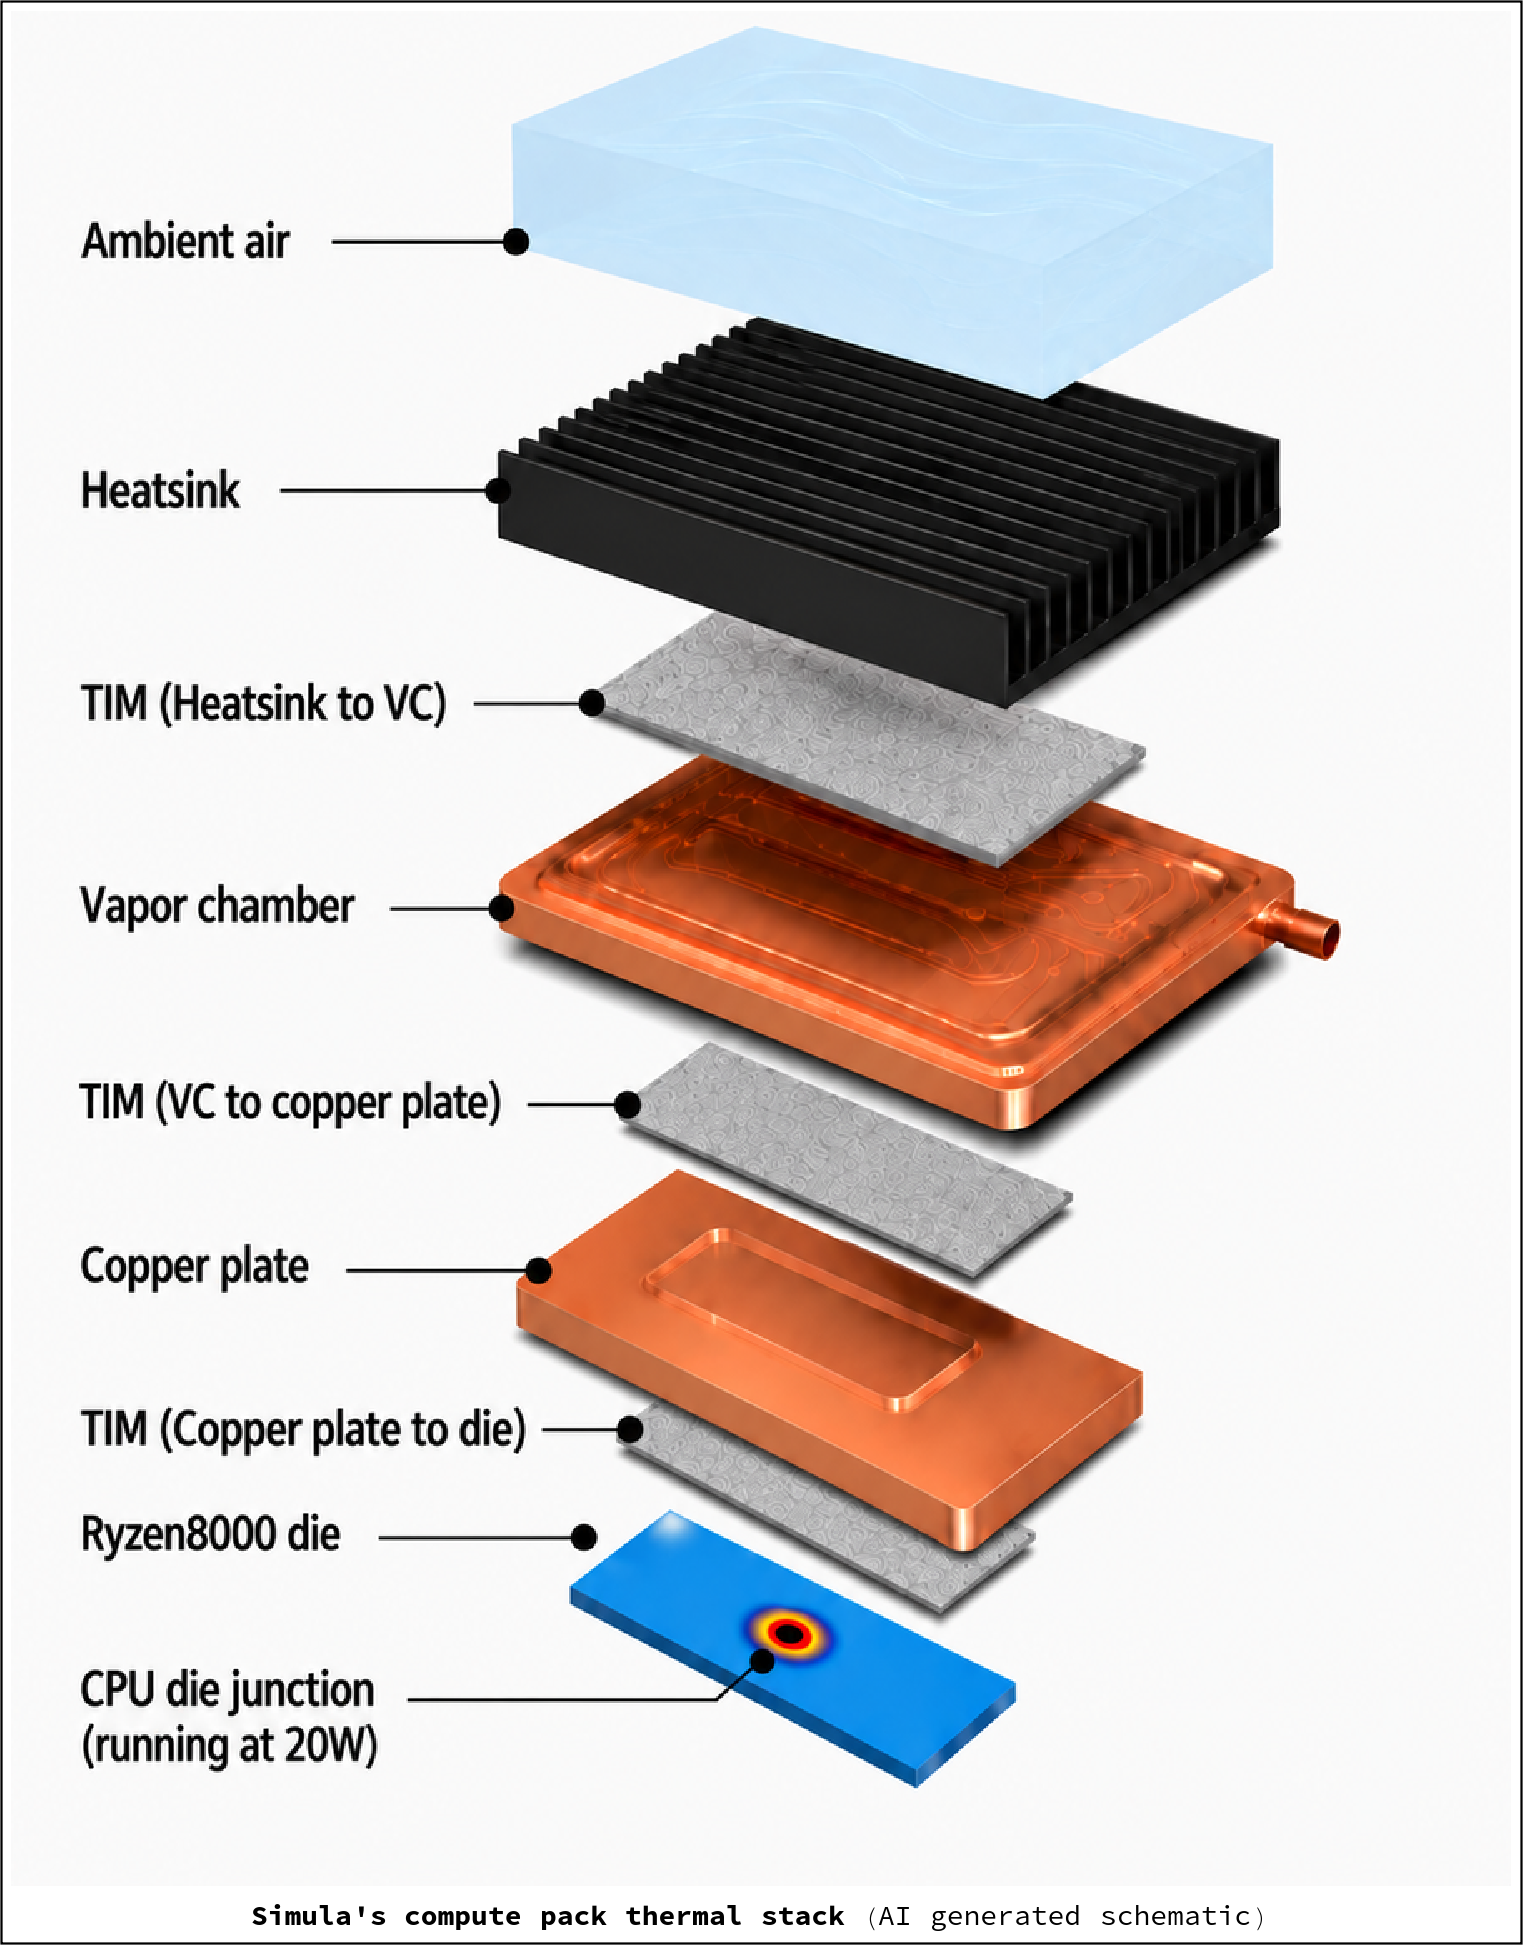
When our compute pack runs, it generates a lot of heat. The way this heat gets removed is a via a cooling system (or "thermal stack"), which transfers this heat up and out of the device into the ambient air. Our thermal stack has the following components:
- CPU: Modeled here as the source of most of the heat.
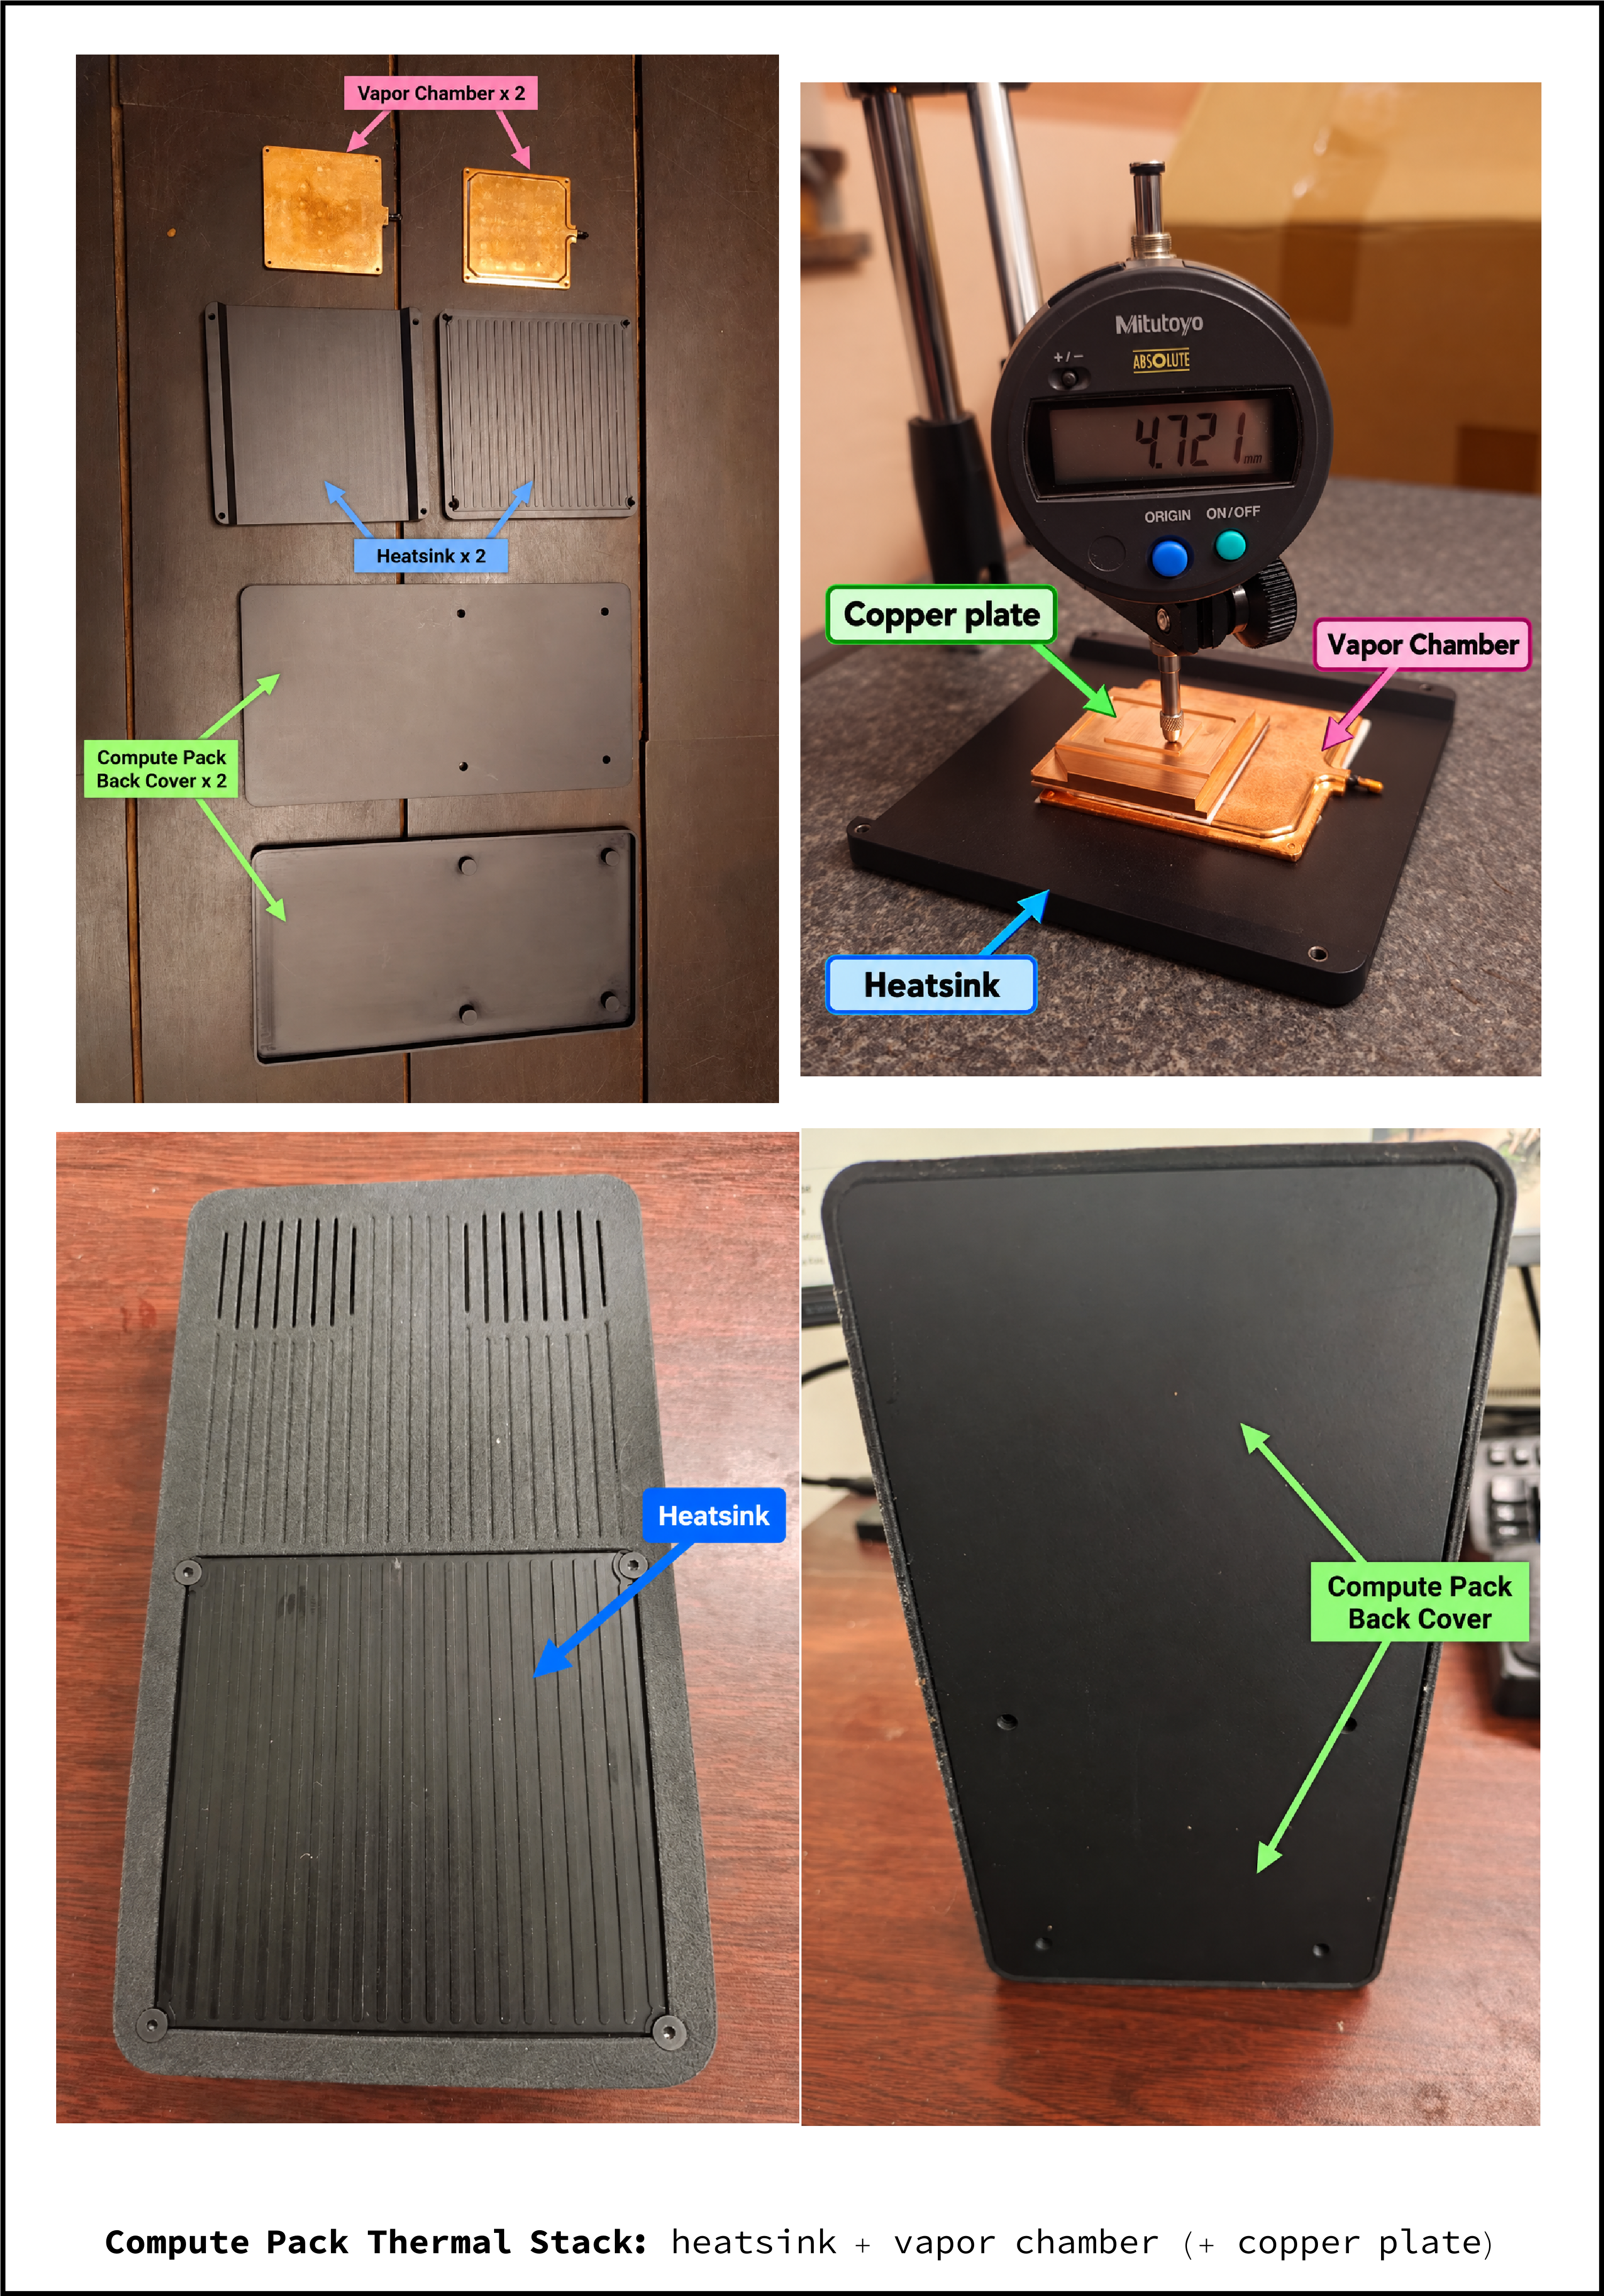
- Vapor chamber: A chamber with a small amount of liquid (typically water) which can quickly spread heat across a larger area. When heat touches its surface, the liquid inside the chamber turns to gas/evaporates, which in turn helps it spread across the chamber. In cooler parts of the chamber, condensation converts the vapor back into liquid form, which in turn passes the heat through the chamber walls up to the next layer of the thermal stack.
- Heatsink: The final absorber of heat before it is passed into the ambient air. The more surface area it contains (via "heatsink fins"), the more heat it can absorb.
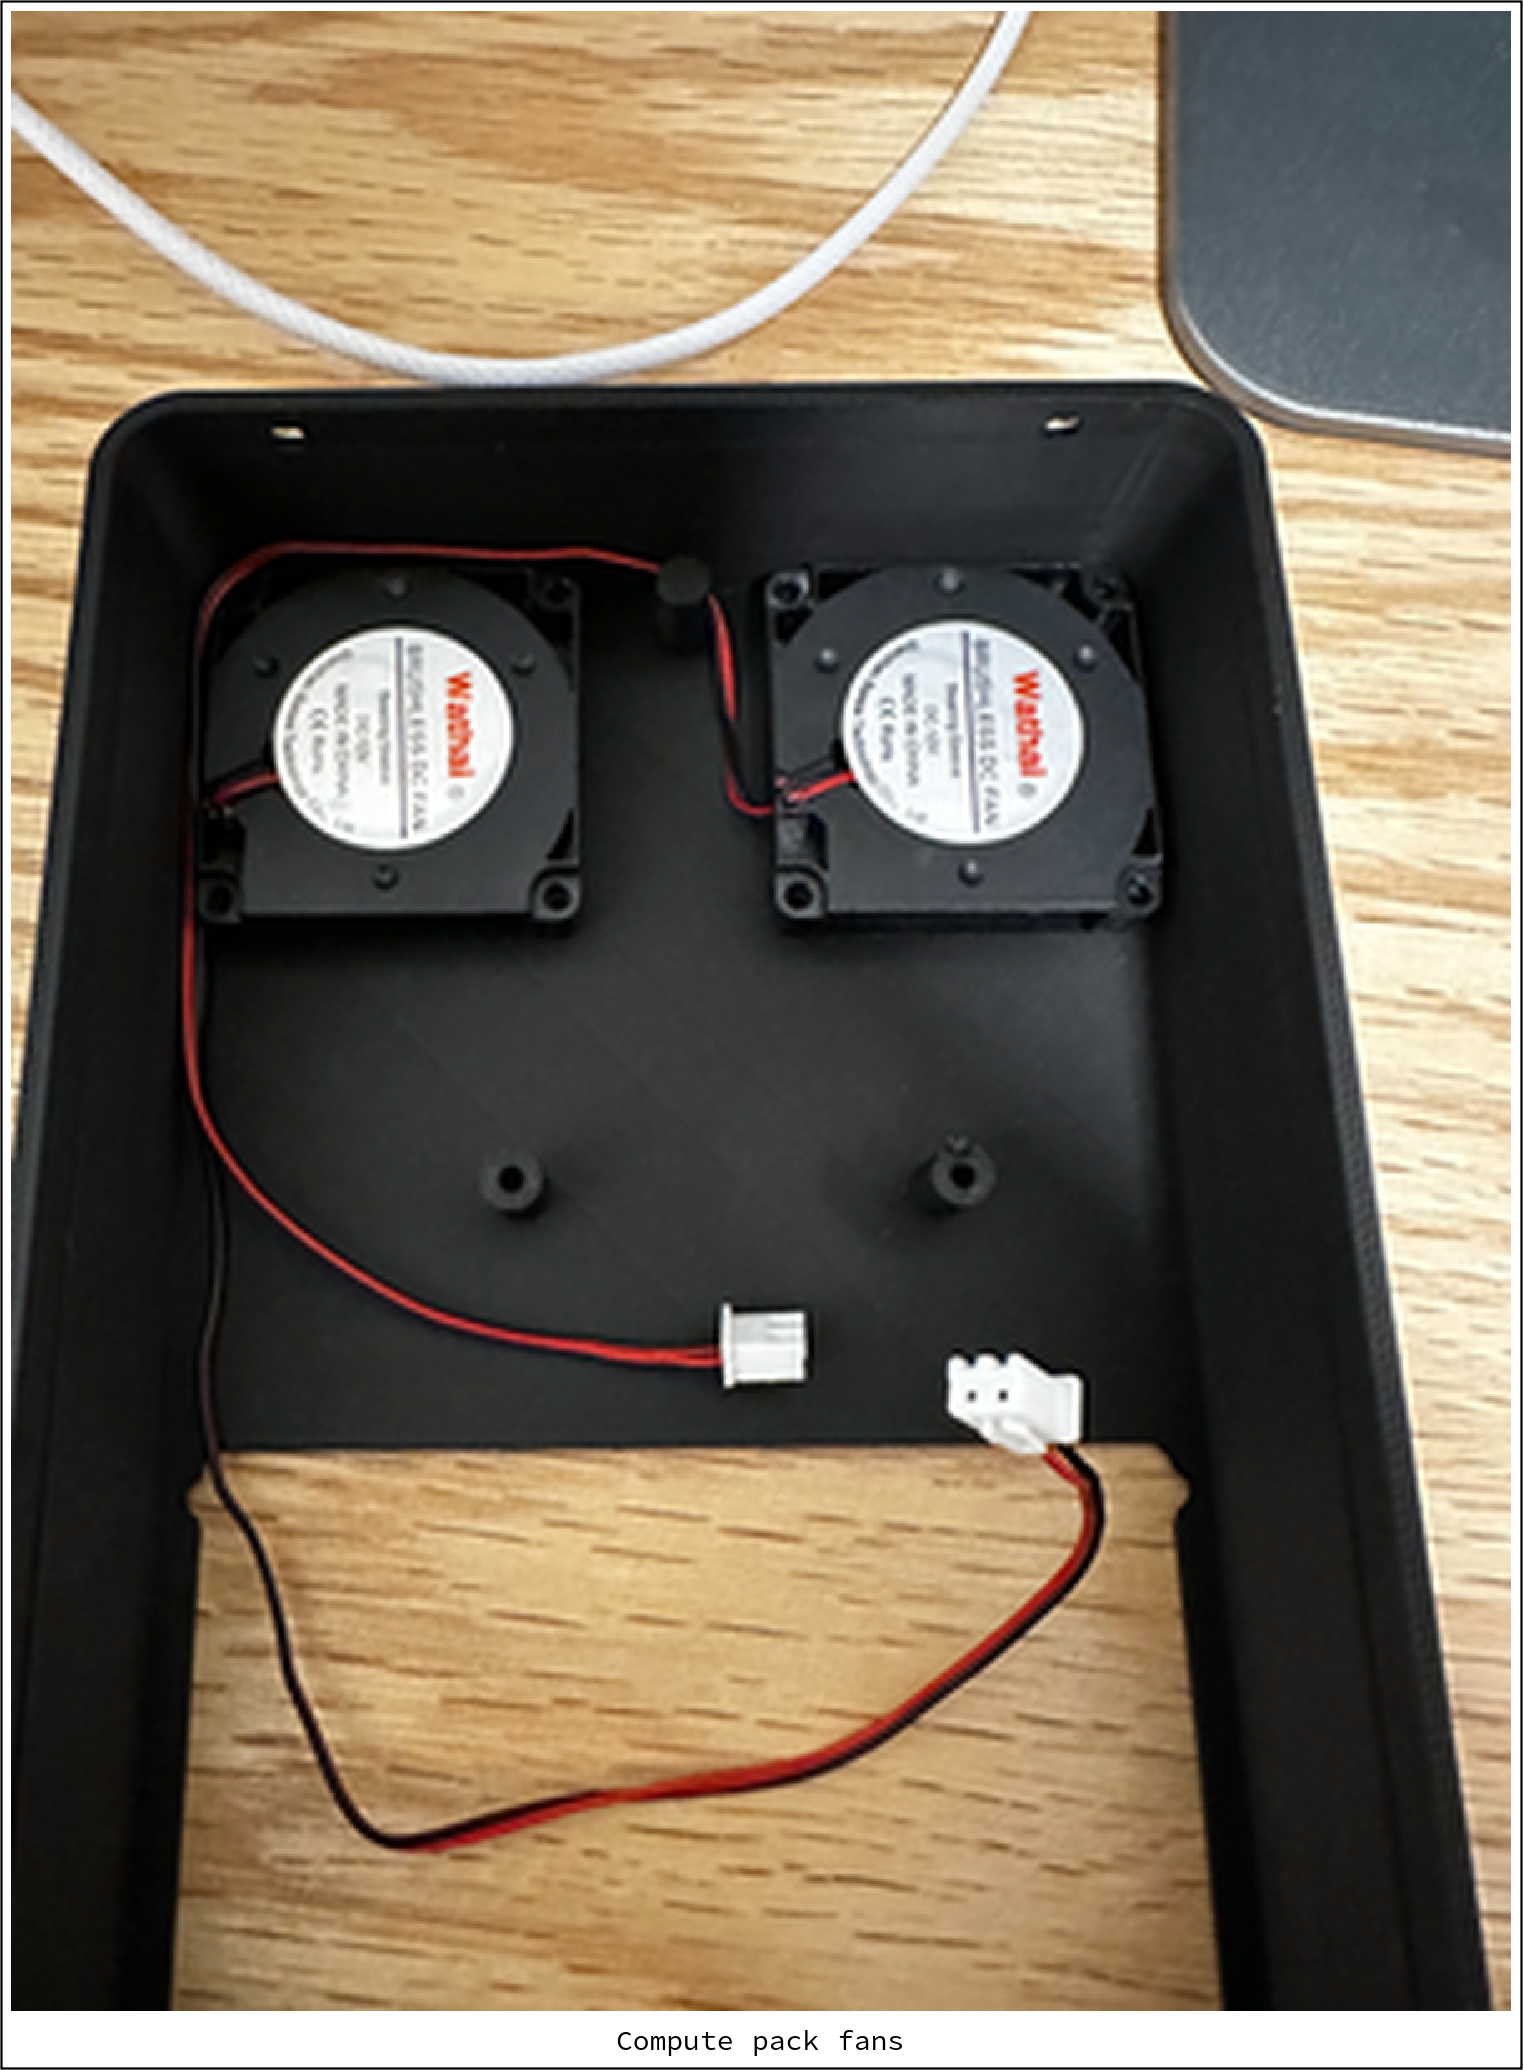
- Fans: Blows air across the heatsink to help it carry heat away.
- Copper plate: We used this as an intermediate piece to fill space/improve contact between the above parts. (Our final design won't use this).
- Thermal Interface Material (TIM): A paste which fills the microscopic gaps between the above surfaces (to improve heat transfer and reduce thermal resistance).
An (AI generated) schematic of our stack looks as follows:
and here is what some of these components look like in real life:
Here are our fans:
5 Biggest Problem: Not quite enough heat is getting released
The maximum temperature our Ryzen CPU is supposed to run at is 100℃. But running Simula under even a medium load (e.g. running Simula while compiling Simula), and we're able to hit this way too easily. For example, when we probe system temps using lm-sensors, we see something like the following:
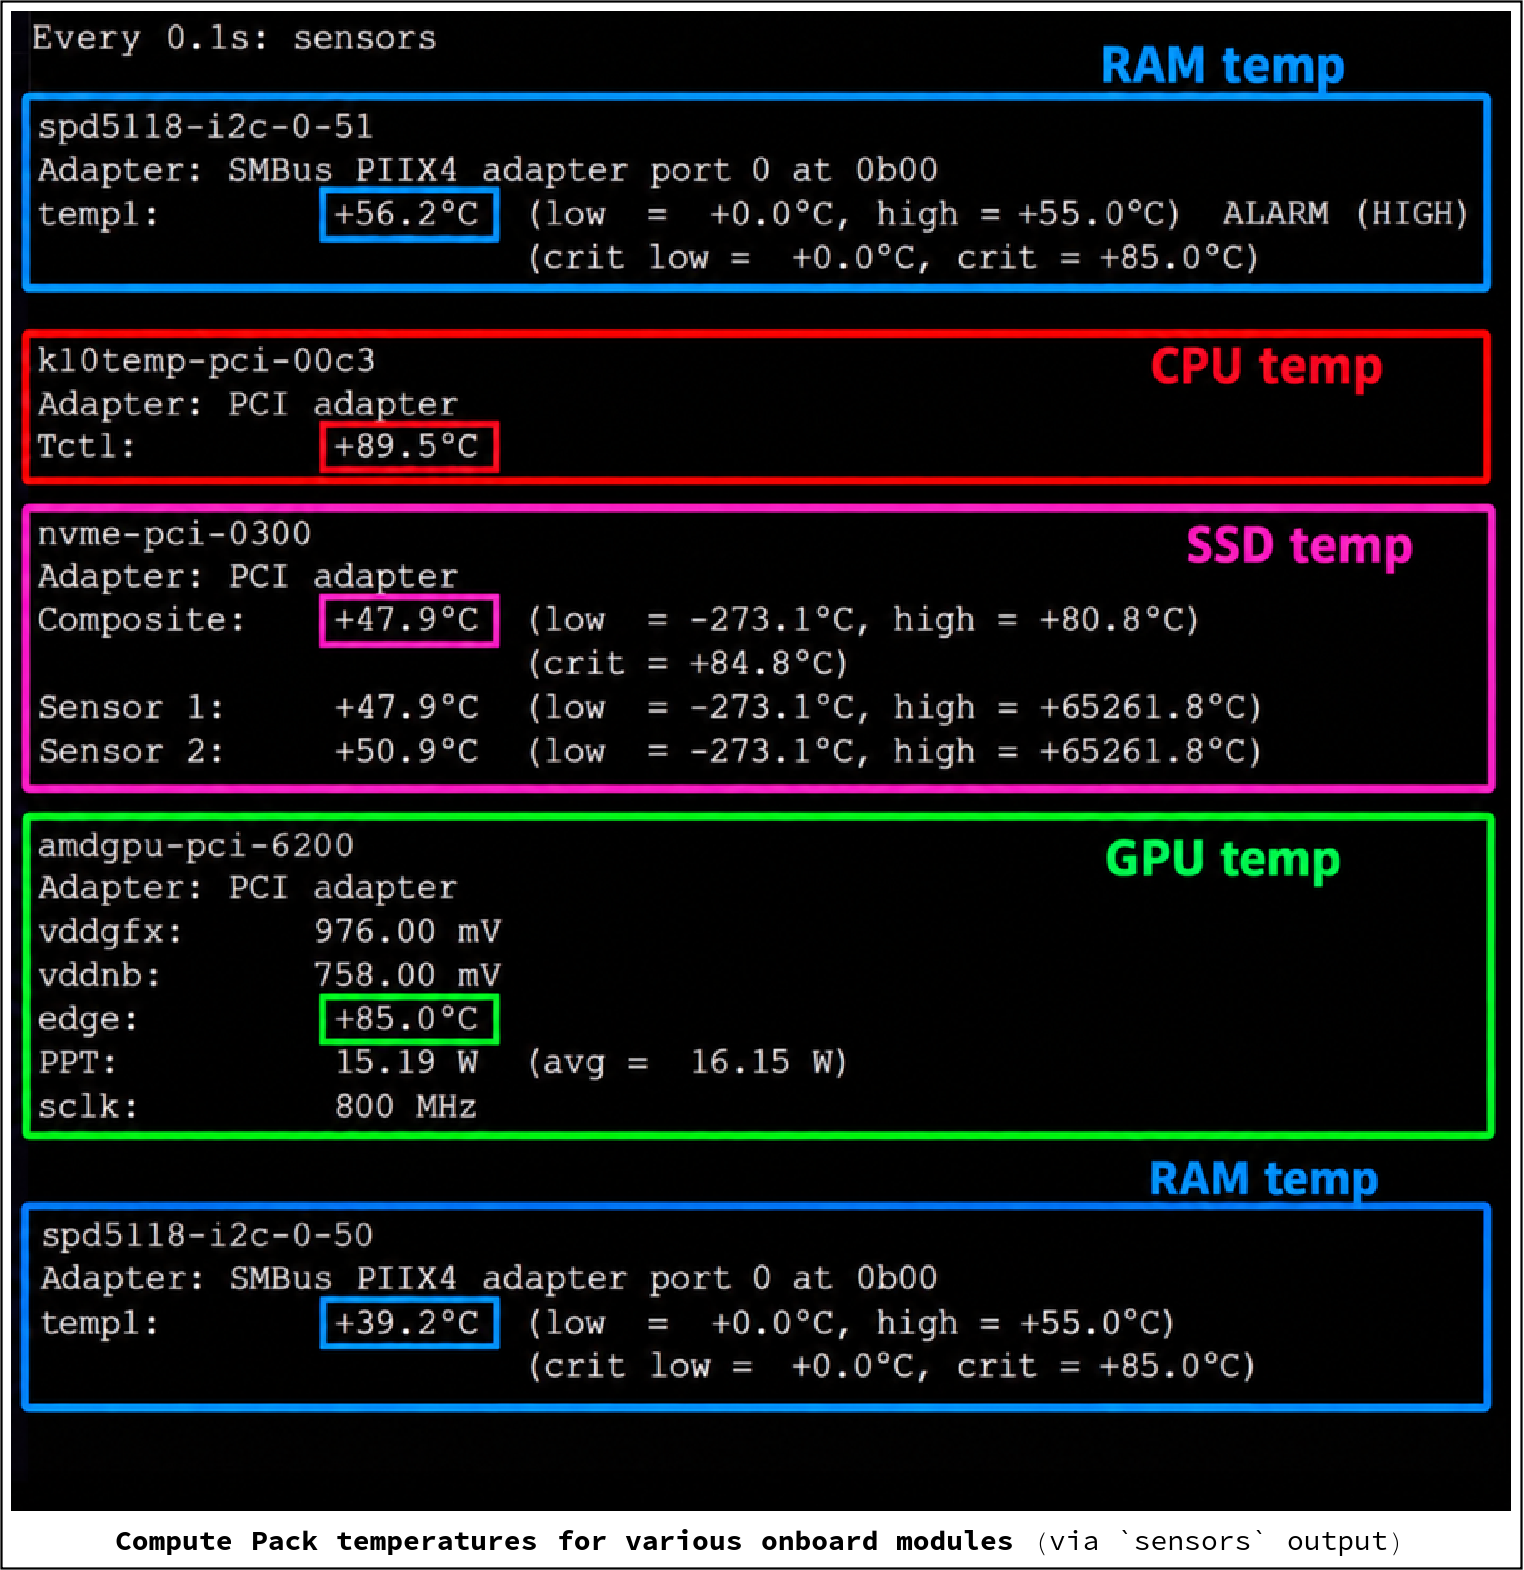
Here we're showing an ~85℃ CPU temp (running at ~15W), but we're able to hit 100℃ quite a lot depending upon what's going on. When this happens, our Ryzen CPU throttles the wattage it runs at downwards, which in turn causes Simula's performance/frame rate to drop.
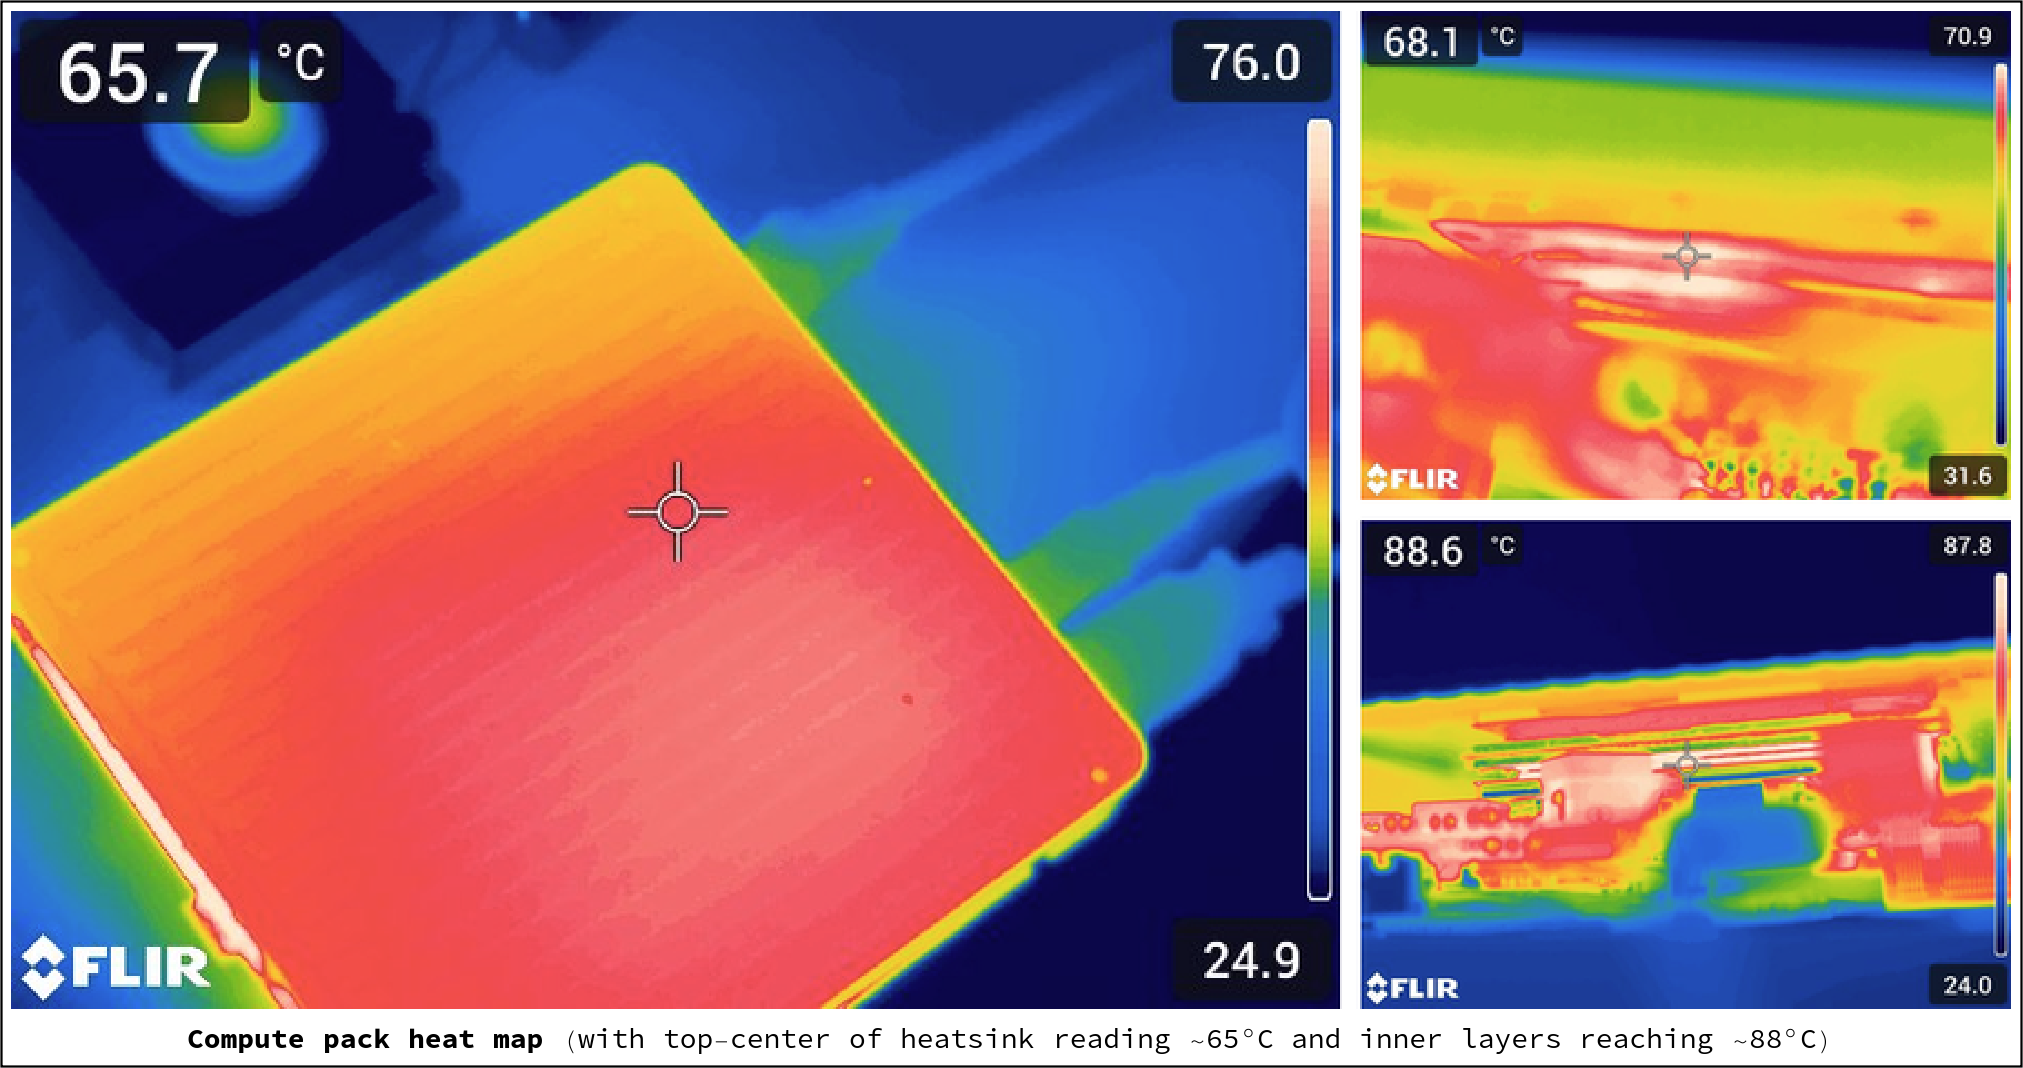
Another problem with running too hot is that the surface of the compute pack gets...well, too hot. In our case, parts of its surface are reaching as high as ~65℃ under load (see above). For comparison, the surface of an Android smartphone can get as hot as ~45℃ (which is a way more sensible target than where we're at now).
5.1 Locating the source of the heat issue (and fixing it)
Since we're definitely running too hot, we had to figure out why this is. Generally, the problem could be at any layer of our thermal stack. But through heat testing, we were able to determine the two biggest sources of heat friction were (i) coming from the CPU die itself (which we can't control) and (ii) from the heatsink to to ambient air junction (which we can control).
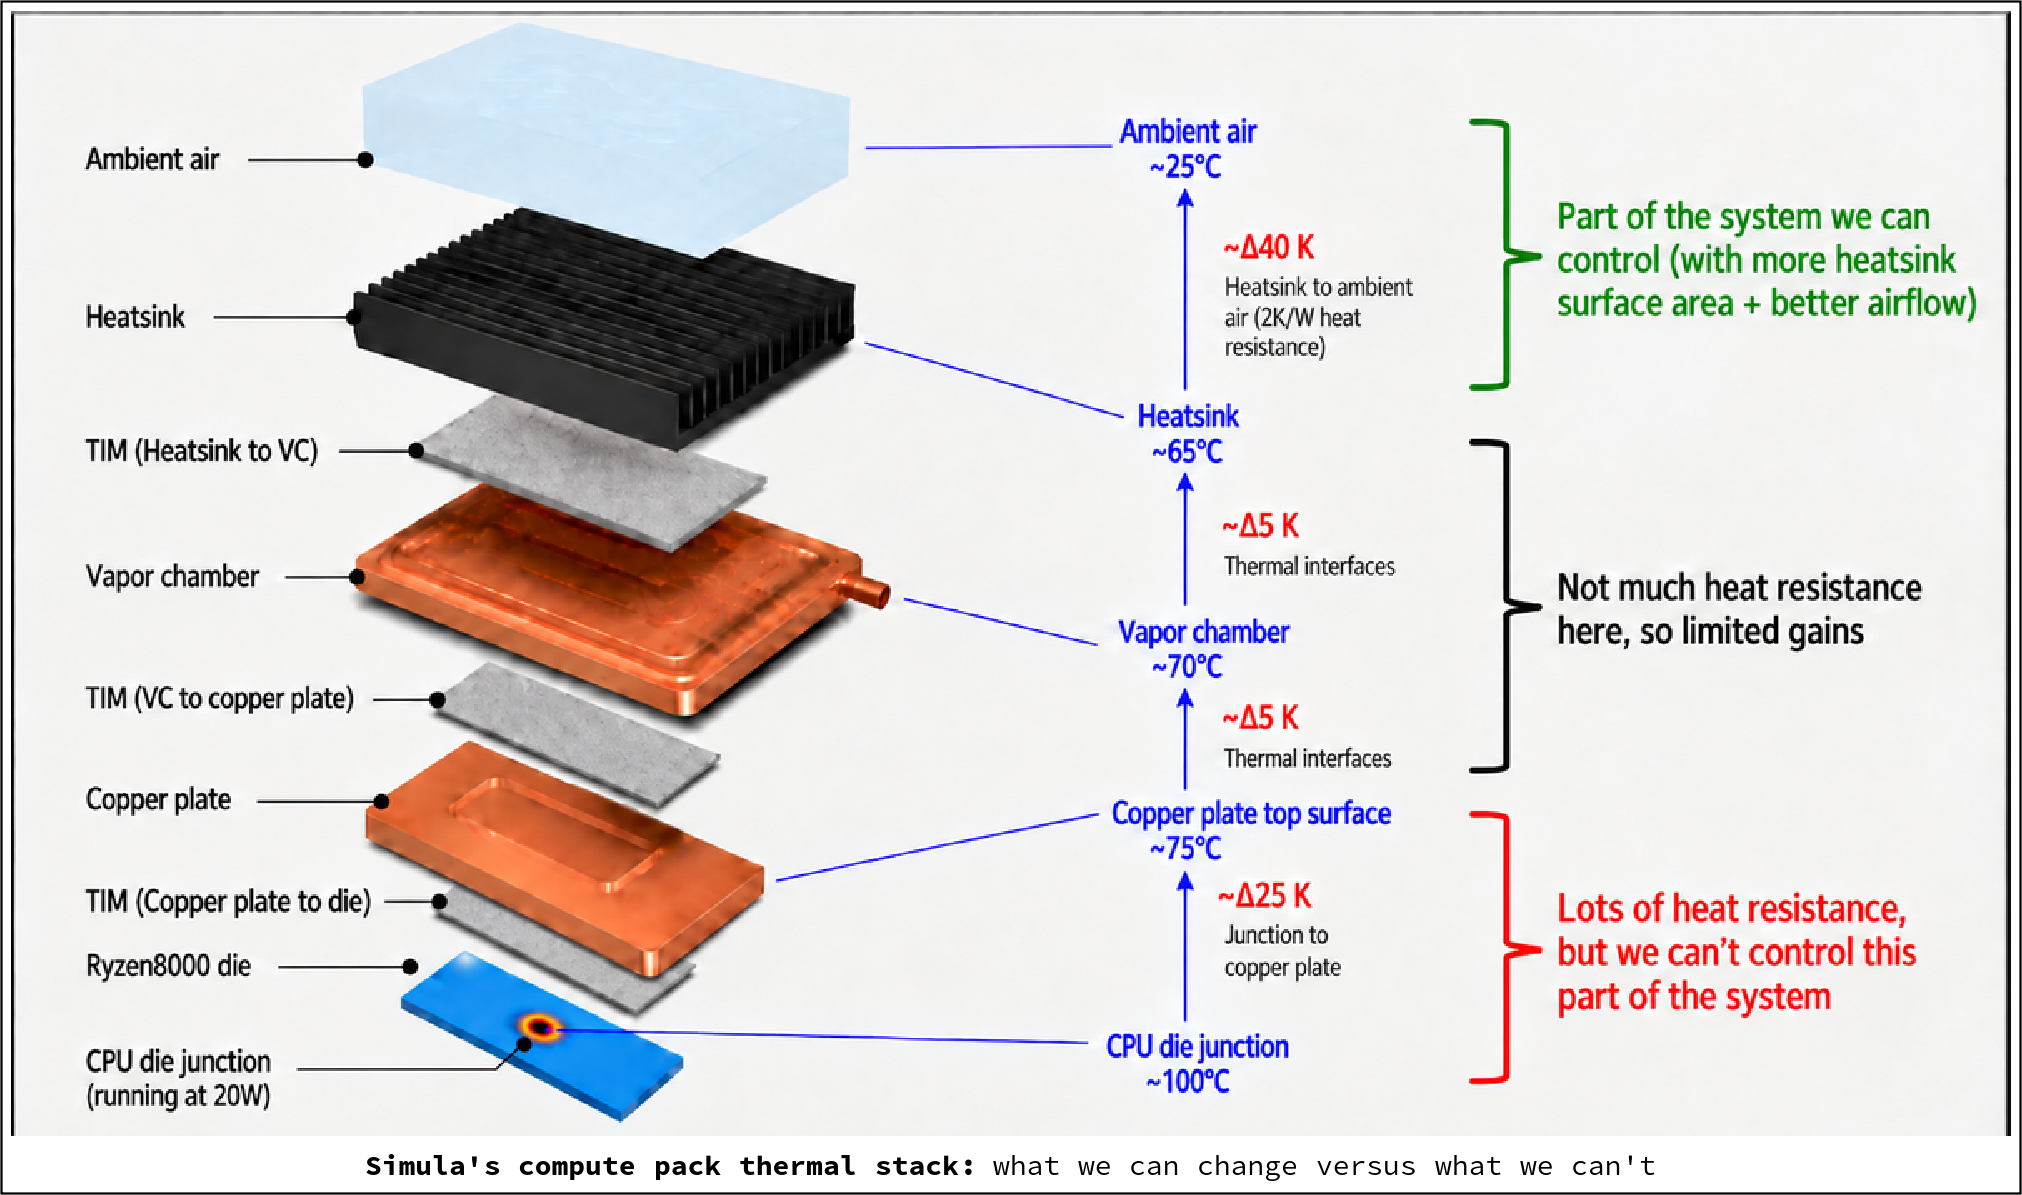
So the way to fix this is basically to increase the surface area of the heatsink (by increasing the heatsink "fin" density), and possibly also by changing the material from aluminum to copper (which will add to the compute pack's weight as a tradeoff).
6 How the compute pack relates to the rest of our Simula One stack
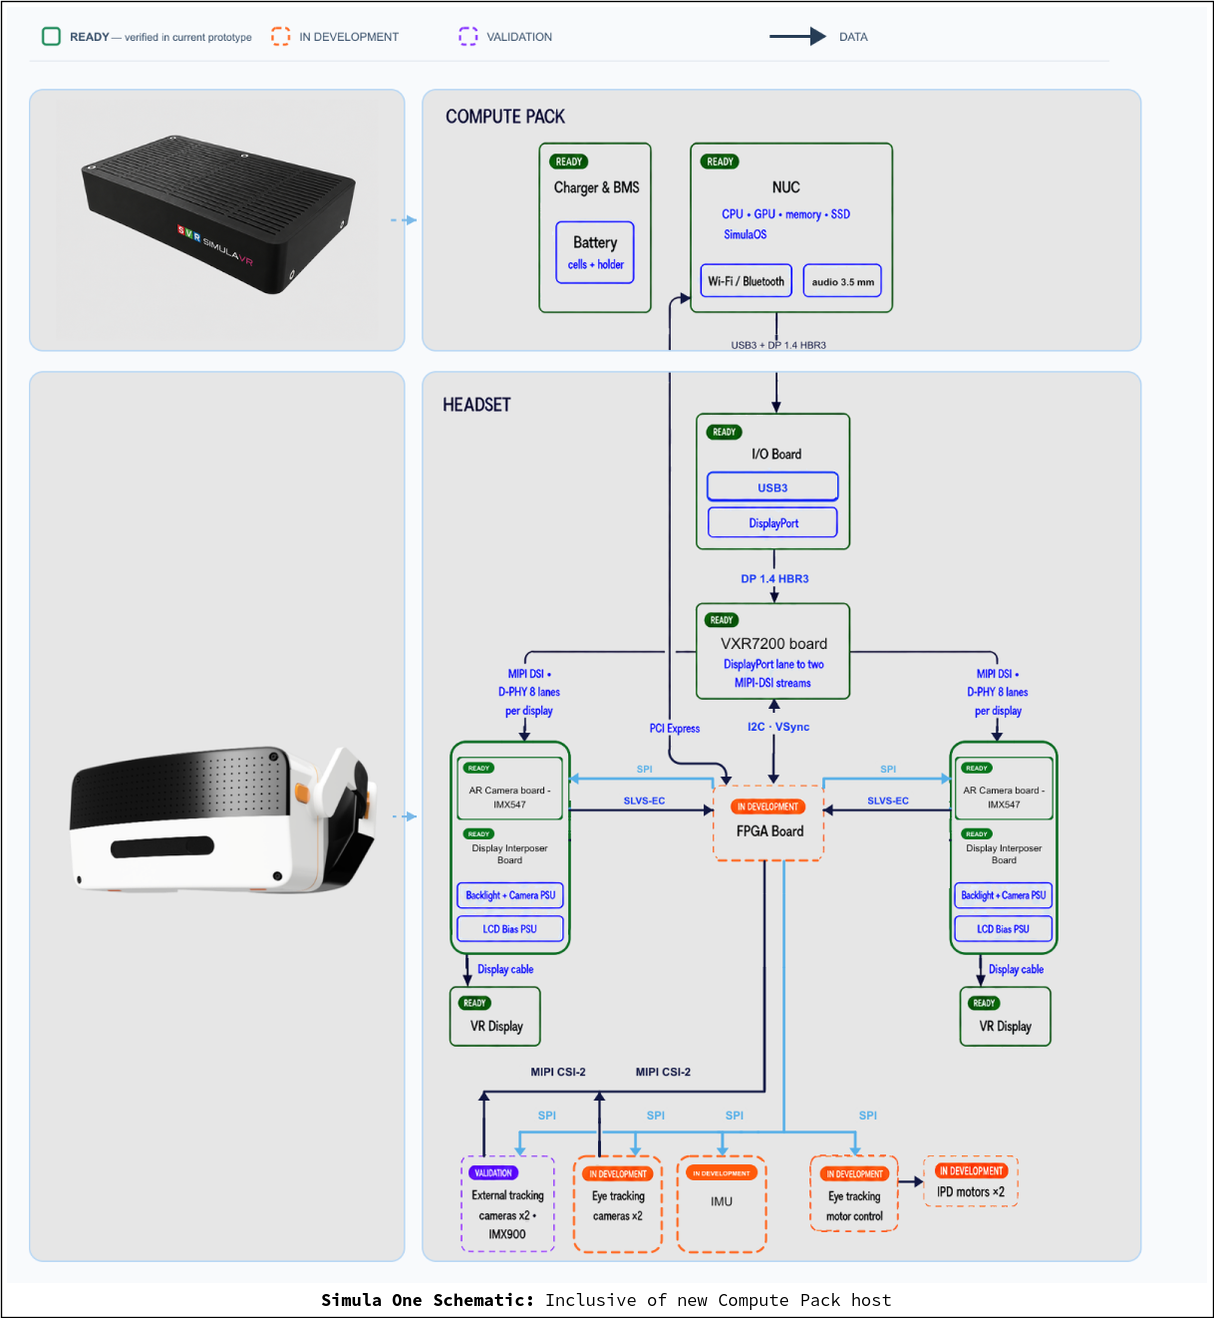
The Simula One compute pack is of course part of our Simula One headset. So here's how it fits in with the other components, in broad strokes:
7 Interested in a compute pack?
If you're interested in purchasing/demoing a compute pack, shoot me an email at georges@simulavr.com.